


How To Paint Bodyshells (Basic)
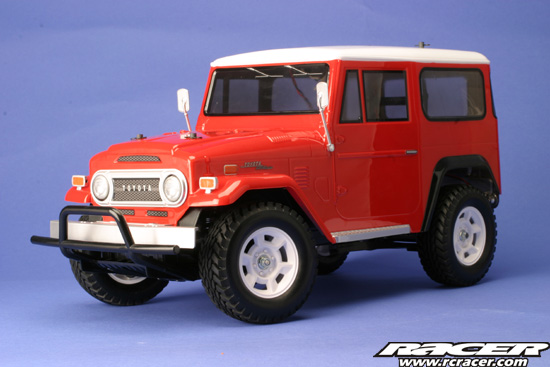
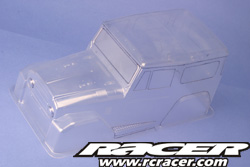
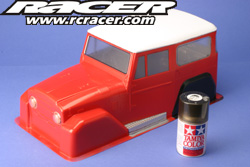
Painting bodyshells is seen by some as a bit of a black art. In reality it is relatively easy although some still manage to screw up just painting a simple kit colour scheme. In this guide we will take a Tamiya Land Cruiser body and paint it almost as per kit so you can see the processes involved.
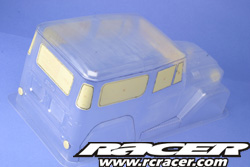
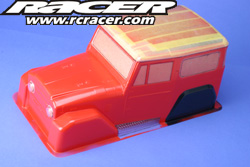
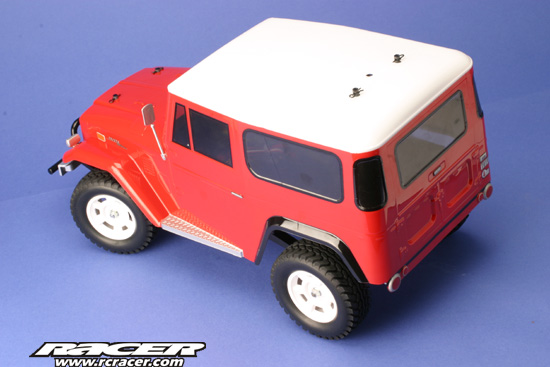
Our Land Cruiser calls for three colours in the instructions, all painted on the inside of the body. The rear wheel arches need black, the roof white and the main body colour. Here we are making two deviations. The shell has moulded in side steps by the doors, these will be painted silver. Also we will not use Tamiya’s suggested Mustard Yellow for the main body colour on the grounds that it is a disgusting yucky colour. In the Dulux catalogue a similar colour is called Autumn Phlegmburst…
Get Tooled Up
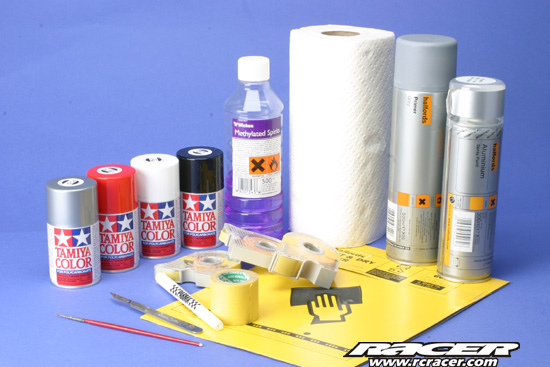
The process of painting a bodyshell requires some simple obvious tools. In addition to paint, a knife and some masking tape though we suggest adding a few low cost extras. Also the quality of materials used will make a difference to the end result so choose wisely.
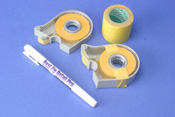
There are many lexan paints on the market, don’t be tempted to use something not formulated for bodyshells. Chances are at the first impact it will turn into a leper and shed large flakes of paint. Seeing as we are painting a Tamiya shell, we are using Tamiya PS (Polycarbonate Spray) paints although another favourite here at Racer is Pactra and we will be painting the shell using solely rattle cans. Our Land Cruiser throws another element into the mix though as it has bolt on injection moulded (hard plastic) parts and for this we will be using Halfords Automotive paint. Don’t be tempted to use household masking tape, Tamiya Masking Tape is the way forward here. Coming in a choice of widths it is easy to use and its fine paper grain gives the best lines. A parma pen or Sharpie is also useful for marking on the outside overspray film where the colour borders are.
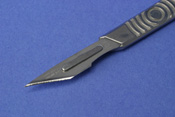
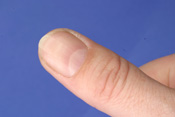
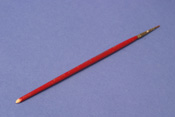
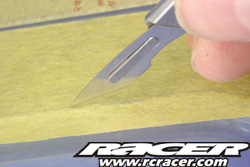
When choosing a knife, select one you are comfortable with and fit a new blade! No point trying to track finely cut lines with something that has been previously used to hack at trees, limbs etc. Also above you will see a paint brush. Lovely, why is this here when we are using spray cans? Its not the bristle end we are interested in, check the end of the handle with the paint removed, it makes a great tool for burnishing down the masking tape into recesses. Make sure you sand the paint off the brush handle though or it will end up on the shell somewhere. Don’t ask how I know this… Finally there is a thumb. Unless you are unlucky or per chance have had a nasty yachting accident, you should have a couple of these. This thumbnail also makes a good burnishing tool for masking tape. Dirty nail is optional as is additional girly length nail which assists in removing masking tape.

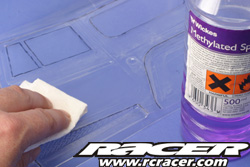
The paints adhere to lexan much better if they are given a key. Here we will be using 600 grit wet ‘n’ dry paper finer is fine, courser will show marks in the paint. Colours cover the scratched surface although some specialist finishes such as Alclad Chrome should not have the surface keyed. Paint also likes clean surfaces and Methylated Spirits is great for cleaning down the shell before masking. It evaporates quickly and does not attack the material. Use tissue to wipe the Meths on or blow your nose, just don’t use the same piece for both. Obvious really.
Getting Started
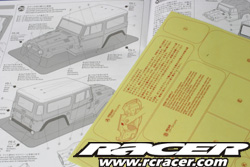
The first thing to do is study the instructions and see where the colour borders lie. Most bodyshells now also come with window masks so it is a good idea to take these into account as well.
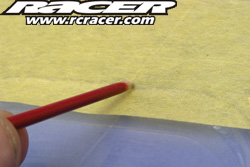
Use your marker pen to draw on the outside of the bodyshell on the overspray film where these colour borders lie. If your shell doesn’t have overspray film, don’t worry, the Methylated Spirits will remove most types of pen after you have finished although it is best to check this first on a piece of the shell that will be cut out before you start.
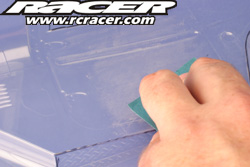
Next, key the bodyshell. Use the 600 grit paper and rub down all the surfaces to be painted, avoid the windows though! Make sure you get into the recesses, all this will help the paint adhere. After you have done this, dampen some tissue with Methylated Spirits and give the inside of the body a thorough clean down.
Taping Up
Now its time to mask the shell. The general rule is to paint the darker colours first and since the wheel arches are black, these will be first to be tackled. Also the window masks need applying and in the case of the Land Cruiser which has LED lights, these areas need masking too. This is all taken care of by the kit masks so apply these carefully now, taking time to look through the shell and stick them in position on the inside using your lines marked on the outside of the shell as a reference. We will be painting our colours in the following order; black arches, red main body colour, silver steps, white roof.
The rear arches can now be masked along with the roof which needs to be white and the side steps which are going to be silver. There are two different methods of doing this:
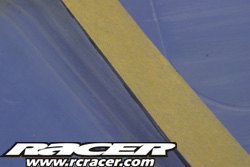
- Applying masking tape over the area then cutting through the tape and removing the excess before painting.
- Using the edge of the tape as the colour border.
If you are not too confident then using the tape as the colour border may be better for you. Cutting tape on the body can weaken it if too much pressure is used although this is easily mastered like everything else, with practice. I am going to use a combination of the two methods here as for straight lines in awkward to get to places, using the tape as the colour border rules.
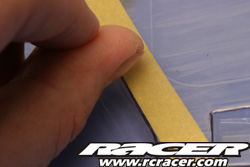
Burnishing the tape down is one step that’s a little secret. Shhhhh….don’t tell anyone…Many don’t do this relying purely on the instant adhesion of the masking tape. Using the end of the brush or the handy thumbnail to achieve the same reduces the chances of the paint bleeding under the masking.
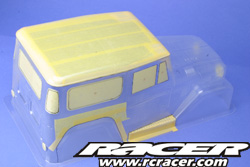
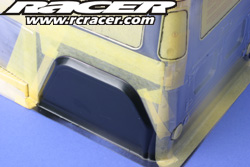
Seeing as the black was going to be applied to the arches first, the colour border here was masked, leaving the area to be painted exposed. Then the roof area was masked along the border of the main body colour and finally the steps were masked again where the red meets the silver. This basically left the black and red areas still clear apart from where the black meets the red as you can see in the image above. Then tape was applied to cover all the areas to be red. Doing it this way meant that the black could be painted, then the tape covering where the shell is to be red could be removed, still leaving the steps and roof masked. Planning ahead can save time, tears and excessive swearing.
Laying It Down
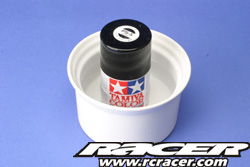
Although spray paints work at sensible ambient temperatures, they do provide a finer atomisation of the paint (finer spray in simple terms) if they are warmed slightly. Don’t be tempted by radiators or heaters, a container filled to about a depth of 40mm with tap warm water is ideal. Just place the can upright in this for 10 minutes or so. Don’t use water that is too hot though or pressure build up in the can may cause problems, do this at your own risk…
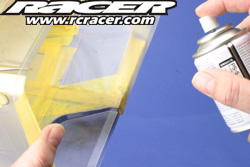
When it comes to actually laying the paint down, thin coats are best for two reasons. One you will get more even coverage and depth of colour without runs and two, the paint will be less likely to pool and want to creep under the tape. Normally I go for three thinnish coats although this all depends on the paint, it should show a hint of light when you hold the body up to the light but not discolour or shadow if you have your fingers behind the colour when looking down on it.
Now after allowing time to dry, which is again dependent on the paint used, it’s time to carefully remove the masking to paint the red area. Take care not to peel off the masking on the windows, lights, roof and side steps though or you’ll have to swear plenty and do this again.
Next the red main body colour is painted again using thin coats to avoid runs and get even coverage. The can was again warmed up to help achieve this before each coat. When the paint has been laid down, leave to dry thoroughly as hefty finger marks in the wet, tacky paint can no way be attributed to ‘part of my paint scheme’ on the finished shell, you’ll be fooling nobody…
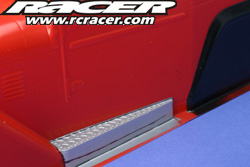
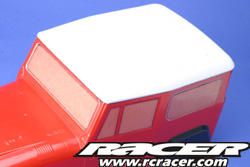
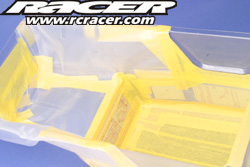
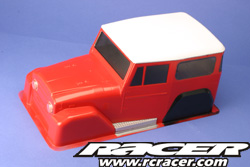
Now that the red is dry, the side steps can be unmasked and sprayed silver using the same method as previous. When dry, unmask the roof and spray white and leave to dry and admire your handywork so far.
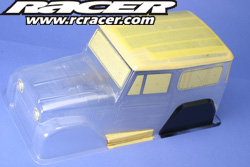
Dark Tints
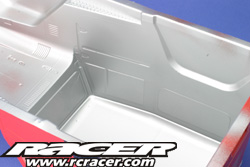
Our Land Cruiser has a large window area, one that would look much better with a window tint! We are going to use Tamiya PS Smoke here, but we have to do something else first. Window tint sprays can change the tone of other paints, especially light colours. So before unmasking the windows, a couple of block coats of silver is sprayed over all the colours on the inside of the shell to help stop this. Then the windows are unmasked and the Smoke applied.

Lots of people have problems getting this smoke to lay down well and not run. The best way I have found it to spray just to the point it glosses when it is going on. Any more and it will run…again practice is the only thing that can help, I still make a mess of window tints on occasion. Just for old times sake, like.
Injection Infection
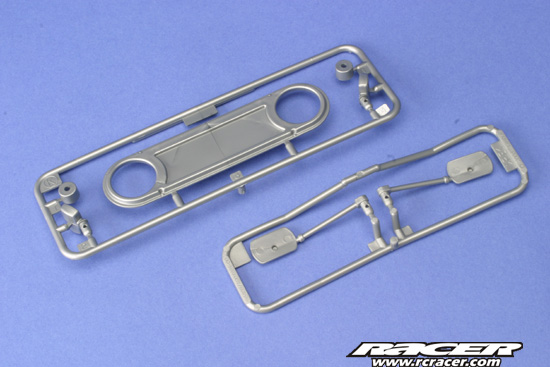
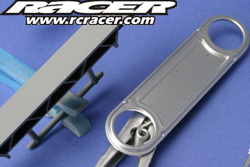
So that’s the lexan shell taken care of but our Land Cruiser has hard plastic parts too such as the grille, bumpers, mirrors and indicator lights to go on the shell too. These need different paints to lexan and as mentioned before, we will be using Halfords car paints here.
The first stage is to primer these parts. Again, as with the other spray paints, warm the can and apply two or three thin coats at ten minute intervals. The first of these coast is best as a ‘mist’ coat, i.e., a very thin dusting of paint to act as a key. When the primer has been laid down, leave somewhere warm, such as an airing cupboard to dry for 24 hours to fully harden. After this time, paint with your choice of silver. We have used Aluminium here.

Again leave to dry thoroughly before drilling the required holes and attaching to the body Look out in a future ‘How To’ guide for guidance on painting injection moulded hard bodies!


Superb run through if only i had the confidence to diy the paint job myself any idea if a paint shop would take it on, or as i suspect it’s too fiddly and time consuming for them, so any other suggestions who might be willing ?.
And secondly is their anywhere printed a parts list to build from scratch a Landrover type jeep or new shape mini ??
thanks
Dougie