


How To Adjust Your Radio
So you just bought that brand new Ready-to-Run nitro buggy, had your first go with it and you instantly noticed that something is completely wrong? What ever you do it just won’t go straight. And it starts to move although the throttle is at idle? Or you had a crash and needed to replace parts of the steering? You recently upgraded to better radio gear? Well, then our Adjust Your Radio guide is one for you!
Modern as well as cheap RTR radios offer a vast amount of possibilities to adjust them to your car or truck, your driving style or the current track conditions. But do you know that a good basic set-up of your transmitter and radio equipment is as important as a proper broken-in engine or a slop free suspension? Find out more about your radio now!
Servo Reverse
You will find servo reverse on almost every radio out there – even the cheapest transmitter supplied with RTR trucks, buggies or cars will most likely feature servo reverse. This feature means that you are able to adjust the servo’s direction of rotation. Sometimes it is necessary to do this as not always, turning left on your radio means your car will do the same. This depends on the way your car is designed as often you would of need to flip your steering or throttle servo to achieve the correct direction. This is eliminated thanks to servo reverse on your radio.
Servo reverse is activated by small switches on your radio or via software if you have a computerised transmitter. But servo reverse not only affects the steering servo but also makes sure that if you pull the trigger on your pistol grip radio means your RC-car moves forward. Same applies to the stick radio guys of course.
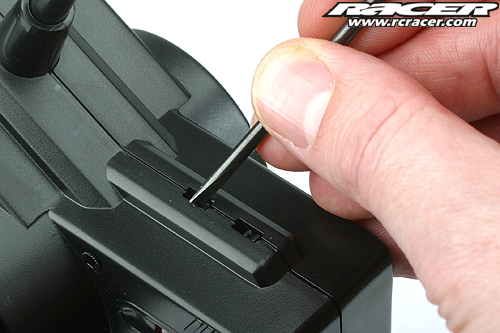
Cheaper radios come with ‘mechanical’ servo reverse. The turning direction of the servo is changeable via small switches. More expensive ‘computer’ radios do this with the help of the transmitter’s software.
What’s wrong here? You turn left on the transmitter but the truck’s turning to the other side. Never use you RC car if your radio is set-up this way!
Steering Trim
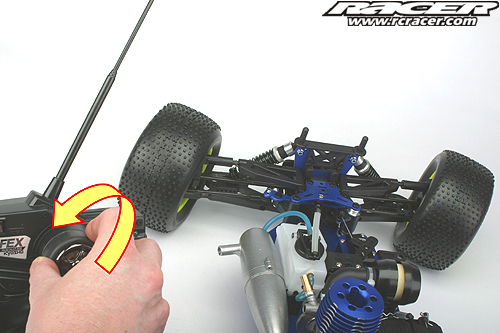
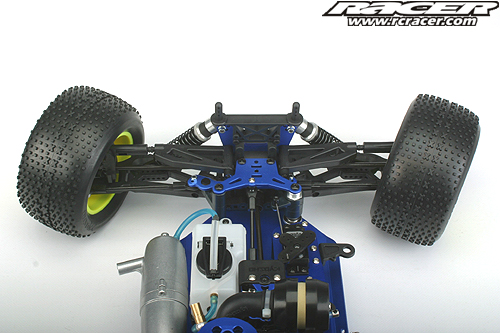
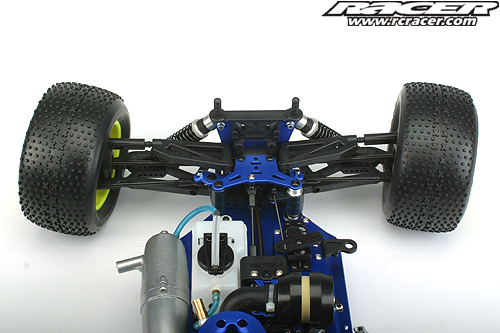
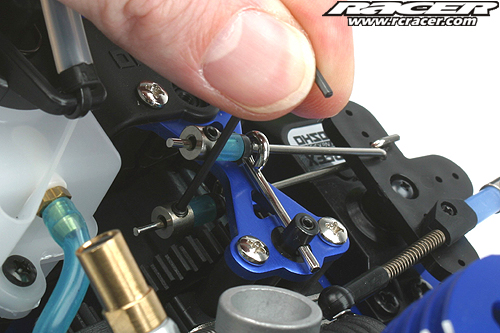
Once the direction of the servo(s) is set up the right way it’s time to adjust the steering trim. Like servo reverse you will find the possibility to ‘trim’ the steering and throttle/brake servos on virtually every transmitter. To properly adjust the steering first make sure the steering trim on the radio is set to neutral. This is checked by small potentiometers on your mechanical radio again with the help of the transmitter’s software on computerised radios. With the steering set to neutral take a look at the steering servo horn. Depending on your type of car it should sit at 90 degrees to the servo case, in-line with the servo case or even at a slight angle. Please refer to the manual supplied with you car or truck for the correct setting. This step is very important and integral part of a proper turning RC car! If you cannot make the servo horn sit at the correct angle by loosening the screw and readjusting the servo horn, turn the radio’s trim lever left or right to achieve the correct setting.
With the radio and steering servo adjusted it’s time to take a look at the front wheels. In case they are not perfectly straight is necessary to readjust the steering link reaching from the servo horn to the steering crank. By shortening or lengthening the link the neutral position of the front wheels is affected. Turn on the transmitter and receiver and adjust the steering link until the car’s wheels are perfectly straight. To fine-adjust the steering it’s now time to look after a large empty parking lot which is the ideal place to adjust all radio settings. The best thing to do now is to let your car drive away from you. If it wants to turn to the left turn the steering trim slightly to the right until your car runs absolutely straight. Same applies if your ride turns to the right: adjust the steering trim to the left until the car goes straight.
Adjust the steering with the help of the steering trim on your transmitter. Please only ever use small steps until you get it running in a straight line.
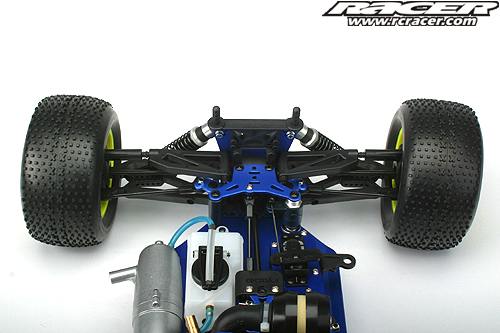
If the wheels of your ride turn into a direction at neutral you definitely need to adjust the set-up of the car’s steering
End Point Adjustment
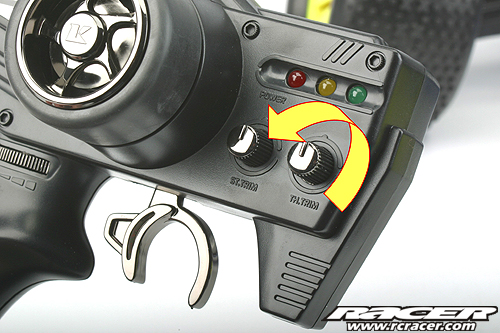
Ok, now things start to become a little bit more difficult. With the steering’s neutral position adjusted you now need to take care of the end point adjustment (EPA). This is something you can adjust mechanically on the steering servo horn or electronically on your radio. By adjusting the end point you make sure that the steering servo only turns as far as mechanically possible. Most steering knuckles on 4WD C-hub suspension cars feature end stops to help protect the front universals or dogbones from excessive angles during a turn. If your steering runs into these end stops it puts unnecessary stress on your servo which is noticeable by a buzzing noise coming from the steering servo. The easiest way to overcome this problem is to adjust the EPA setting of your computer radio by reducing the amount of steering left and right until there is no stress on the servo at full steering throw. You could also use the Dual Rate function iif your radio comes with this sort of feature but it affects the left and right steering throw the same way which is a problem as most of the time you need to adjust the left and right steering throw differently from our experience.
If your radio does not feature any of the above settings you can also reduce steering throw by mounting the steering link on the servo horn one hole closer to the servo resulting in a smaller movement of the steering link while turning the steering due to a shorter lever stroke.
Maximum steering throw is limited by the design of the front suspension. We advise to take your time adjusting the end points to prevent the servo and driveshafts from damage
Too little steering throw affects the possible turning radius
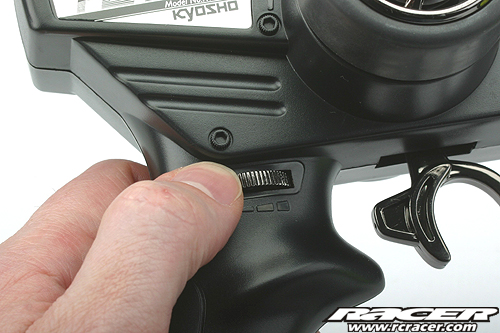
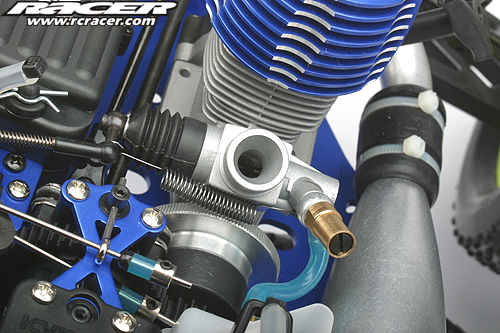
On this Kyosho Perfex transmitter steering throw is adjusted via a small potentiometer. More expensive computerised radios make use of complex software
Neutral
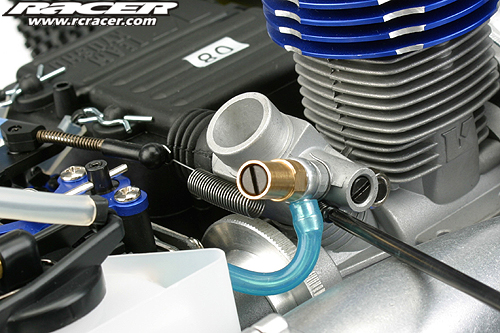
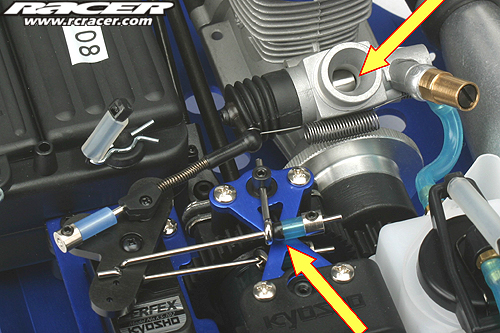
The next chapter is important for all of you nitro heads. A properly set-up and working throttle/brake servo is important for the durability of the clutch, brakes and of course the carburettor/engine. As with the steering, first it is necessary to get the throttle servo to be in neutral position. Then check the carburettor setting. With the throttle servo in neutral position the carburettor has to be fully shut beside the small opening provided by the idle setting screw. If your carb is not fully closed at idle loosen the small grub screw on the adjusting collar on the carb linkage until the compressing spring shuts the opening, then tighten the grub screw again.
Now turn your attention to the brake set-up. To stop the brake from applying instantly after jamming the brakes a small amount of ‘dead band’ is needed. Dead band means the brakes start to apply after around ¼ of the possible full brake setting. This setting needs a bit of play with the adjusting collars on the brake linkage but remember to adjust the collars by millimetres not centimetres to achieve the correct setting! Tighten the grub screws firmly and with the help of thread-lock to make sure they do not come loose during a run.
Important: Throttle trim has to be at neutral before adjusting the throttle and brake linkages
After: Don’t touch your transmitter! The following settings are done on the linkages of the car
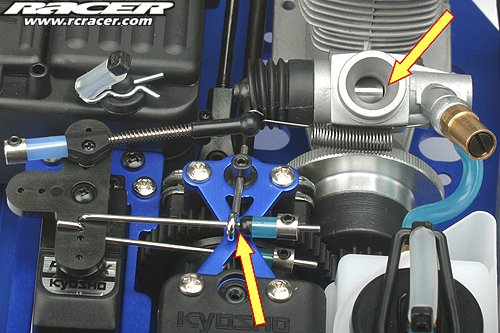
This is a perfectly set-up servo/linkage. The servo is at neutral, the carburettor on idle and the brake linkage has a small amount of dead band to prevent it from applying the brakes at idle
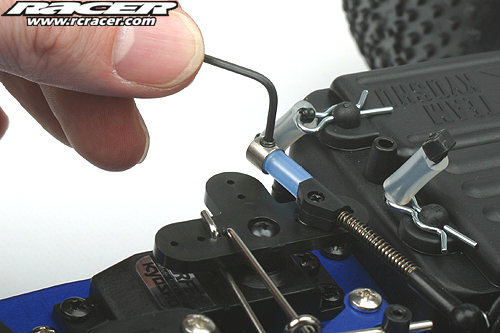
In case the adjustment of the linkages is incorrect, adjust them by readjusting the collars for throttle and brakes
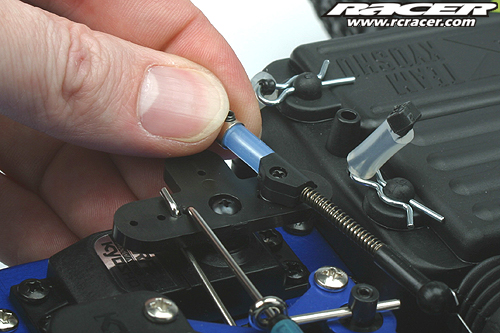
Make sure you tighten all grub screws after work as loose screws may cause the throttle and brake linkages to fail when you need them the most!
Don’t forget to check the second brake on dual disk brake set-ups
Idle
The worst thing you can do to your clutch is to have a nitro engine idle at high RPM. This puts unnecessary stress on the clutch pads and the clutch bell. Therefore you need to adjust the idle screw on the engines carburettor for the lowest possible RPM without the fear of having a stalling engine. Please only ever adjust the idle on the carburettor, raising or lowering the RPM with the help of the transmitter’s throttle trim is not a solution.
Adjusting the idle with the throttle trim is only an option to save you time preparing for a run or after a crash
Always adjust idle at the carburettor
Full Brakes
Now with the idle adjusted it’s time to take car of the end point adjustment of the throttle and the brakes. Let’s start with full brakes first. They should be adjusted to a state that if you fully hit the brakes you have locking tyres when you push the chassis forward. This ensures good brake action on the track. Depending on car, tyres and track conditions you may find the need to readjust the brakes to avoid a locking brake. This is done with the EPA setting again in case your transmitter comes with this feature. Users of cheaper radios have to cope with the fact that they should avoid ‘full brakes’ when braking on slippery tracks.
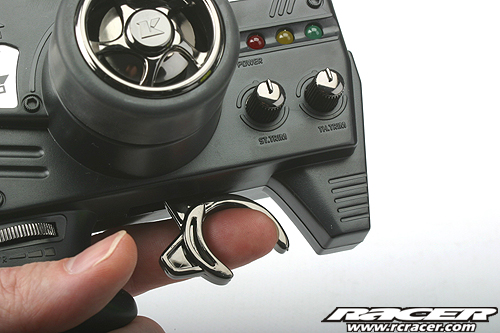
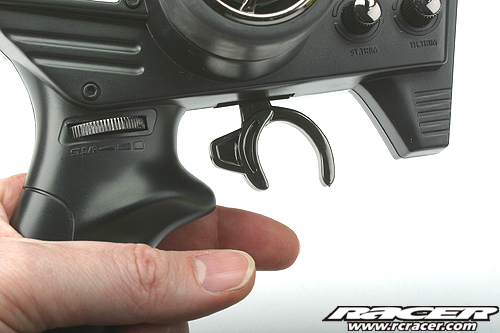
Full brake on a pistol grip radio: push the trigger all the way forward
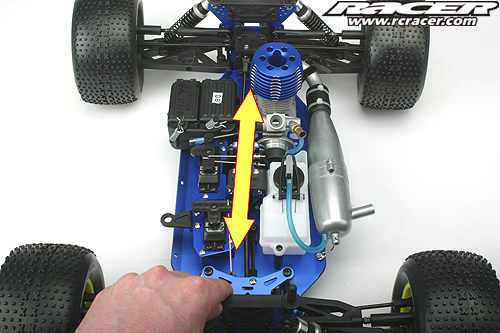
If you apply full brakes the car should have locking tyres of you push it away from you
The idle gap of the carburettor should not change on full brakes. If so, please refer to the previous ‘Neutral’ section
Full Throttle
Last but not least we have to set-up full throttle! If you fully hit the throttle the carburettor has to be open completely. If you have full throttle on the transmitter but you can pull the throttle linkage even more until the end point of the carb is reached you can use EPA again to re-adjust the setting. Same applies if you put stress on the carburettor or the throttle servo because the throttle is on full lock before the servo is. Both are adjustable via the aforementioned EPA setting or, as with on the steering servo, by relocating the linkages to the inner (carb more closed) or outer (carb opened more) holes on the servo horn. After relocating the linkages please make sure they are still adjusted the correct way as described before.
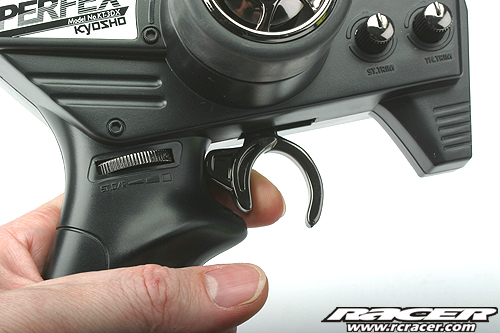
Full throttle on the transmitter with a fully pulled trigger
The carb has to be fully opened at full throttle


Superb write up and guide! After replacing my engine, throttle linkage,servo and radio gear recently, I was struggling with getting it all working correctly, this invaluable guide has got everything perfect! I’ve even learned more about the EPA settings and how to use them!
Thank you!