


How To Match Shocks
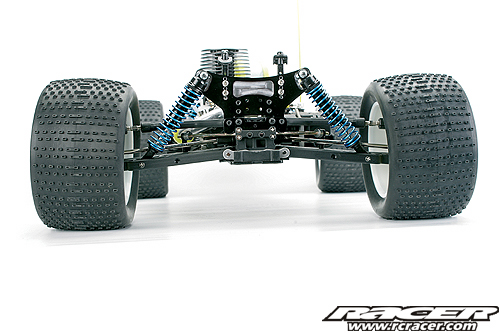
A proper balance between the front and the rear of a car is something we want to achieve every time we are on the track. The traction or site-bite of the suspension is adjustable via the geometry like castor, camber, anti-squat, anti-dive, toe-in and toe-out settings and many, many more. Just as important as the geometry of the suspension are the dampers, regardless whether you only have only one in your pan car or up to eight as some monster trucks have. Given your rides suspension geometry is set to a reasonable state, then the shock absorbers come into play. But please don’t be fooled. The spring elements often seen on entry level cars are not equal to a race-bred oil-filled shock. So please make sure you upgrade your car to real ‘dampers’ until you try to do any of the following.
When?
Taking care of your shocks is a necessary task for racers and bashers alike. The racer obviously changes the shock set-up if the track (conditions) or personal needs call or it. Maybe that hard shock oil you used at the last indoor meeting does not match with the rough and slick surface of the outdoor dirt track you are running on now. Or you need to lower the weight of the oil as the ambient temperatures went down during the day.
Bashers of course will start to work on the dampers when back end of the buggy or truck slams to the ground every time you hit that humongous jump in you backyard or in the gravel pit nearby.
Usually Ready-To-Run cars and trucks come with pre-filled shock absorbers but due to many factors the shocks can leak meaning you need to refill them before having a first go with you new car. It’s also quite usual for most of the current shock absorbers to leak a bit of oil during time so you should check them frequently to make sure they are properly filled, clean and work as they are meant to do.
As we guide you through building a new set of shocks you can jump to the next chapter now if you plan to do the same. For all of you that plan to revise an already used set of shocks, it’s about time to detach them from the suspension, strip them to their bones, clean all parts with denaturised alcohol and replace any broken or worn parts like seals, piston rods etc. with new parts.
All the same
When building shocks make sure you always build them as a pair. If only one shock needs a rebuild or refill, rebuild or refill the one on the other side too as it is unlikely that you match the existing setting on the first go. Also it is better to refill both with the same shock fluid to have the best matched shocks possible. Plus you can check the other shock for wear and damage too.
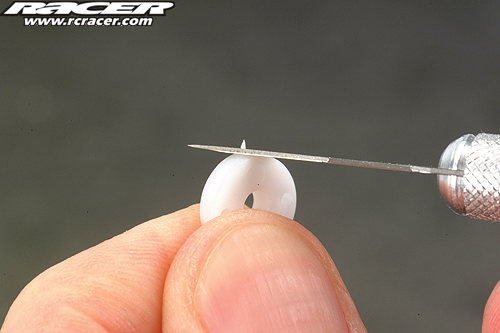
Regardless if you build shocks from new or rebuild existing ones: please make sure that all plastic parts like pistons, spacers etc. are free from flash. Flash describes the thin plastic parts that are left over from moulding or machining plastic parts.
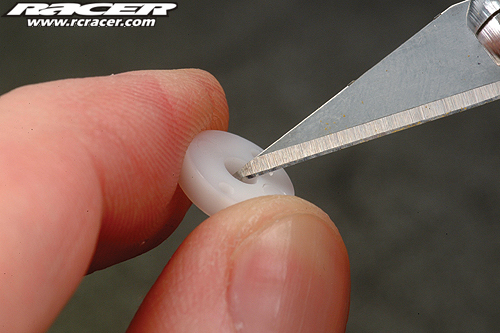
Use an X-Acto knife to cut any flash away on the outside and inside of pistons and spacers. But beware! X-Acto knifes and scalpels are very sharp. Ask an experienced person to do this task for you if you are unsure what to do.
One of the first things to do is to assemble the shock seals. Use Team Associated Green Slime when you fit them into the shock body. The slimy substance prevents the seals from swelling due to the silicone shock oil and also protects them from scratches when you pull the shock rod through them at a later stage.
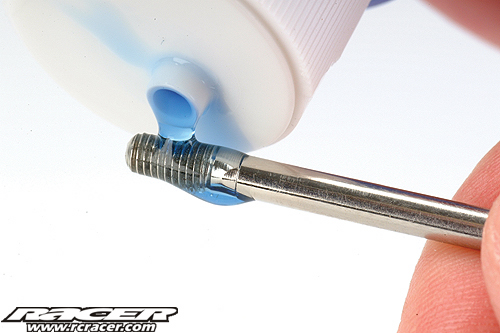
Additional to Green Slime you should always lube the lower threads of the piston rod with shock oil before inserting them in the shock body as the un-lubed threads may harm the silicone shock seals. Before inserting the shock rod make sure you use the recommended amount of travel limiters in case the suspension set-up required them.
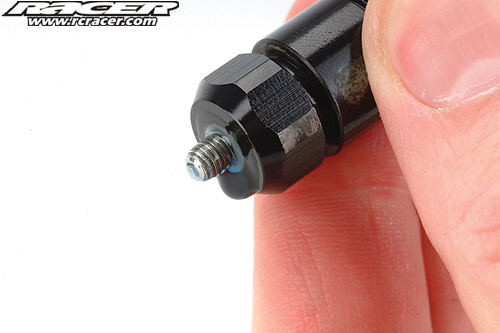
When the rod is inserted all the way move it up and down a couple of times to bed the seals in a bit. Now the damper should feel ‘smooth’. If you experience any scratching feel or even noises, disassemble everything again as flash on the pistons or spacers may interfere with the shock body or piston rod.
Fill them up
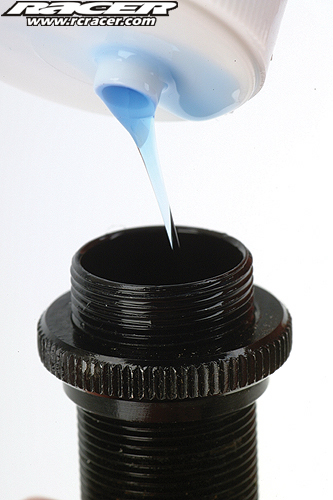
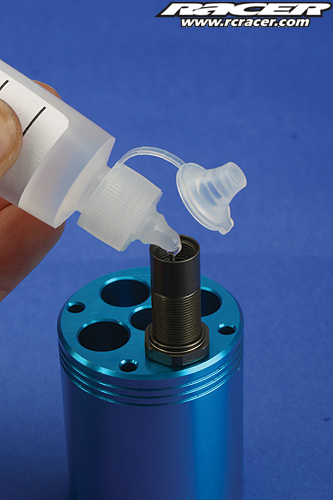
With inserted piston rods its time to fill the shocks with suitable shock oil. Often the manuals supplied with kits or RTR cars and trucks state the ‘weight’ of the oil needed. If you are unsure what type of shock oil to use ask your local hobby shop for advice. If you plan to build up a stock of oil for set-up purpose try and stick with one manufacturer to make sure you can compare the different weights. For example 30wt (weight) shock oil from supplier A is a 28wt or a 32wt at supplier B! Only if you stick with one manufacturer you can make sure different weights are comparable!
When filling the shock first make sure you pull the shock shaft all the way down. Then fill the shock body about 75% with the oil chosen. Now push the shock shaft up until the piston nearly reaches the surface of the oil.
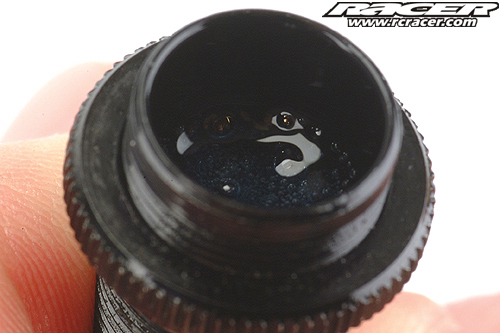
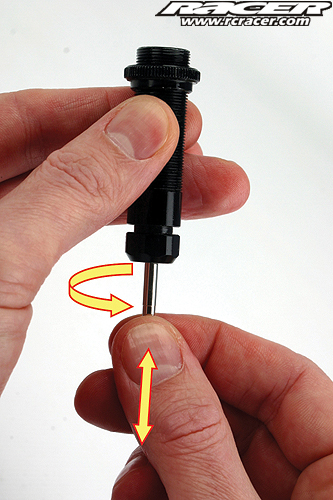
By pulling the shaft down again you remove the existing air bubbles underneath the piston. Let all bubbles pass out of the oil and then pull the shock shaft up and down again to make sure no bubbles are left under the piston.
Now fill the shock body according to the manual and screw on the shock cap. Some dampers also make use of so called rubber diaphragms to compensate the increased volume while the shock shaft slides into the shock body. Do not forget to attach them before screwing the shock cap on.
Equal rebound
With the shocks now filled and (theoretically) ready to go it’s time to check their rebound. Rebound describes the effect of a piston shaft the presses itself out of the shock body after you pressed it all the way in. If the shock shaft comes out all of the way the rebound is 100 percent. If it stays in the rebound is 0 percent. Refer to the manual or set-up sheet again to find out what setting is needed.
If you are not able to press the piston rod in at all, then the damper suffer from what the experts call ‘hydraulic lock’. With too much oil in the shock body you are not able to press the shaft in as oils aren’t compressible. Open the shock cap half a turn, press the shaft in let the excessive oil leak out and tighten the cap when the shaft is inserted fully.
When building your shocks with ‘rebound’ please make sure both dampers on an axle have the same rebound rate to avoid different left to right damping characteristics.
Final testing
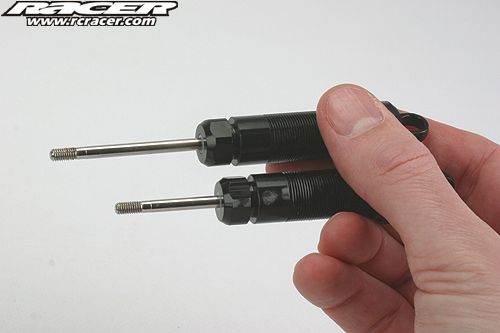
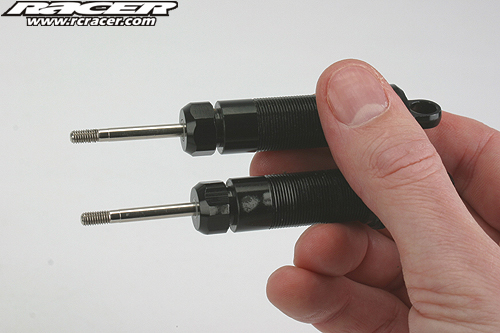
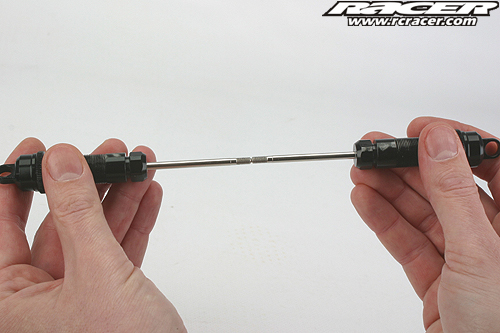
After building the shocks it’s time for a final test. With both piston shafts pulled out of the shock body completely face both piston shafts as shownand press the dampers so you compress them. Both shafts should now move the same distance all the way in. When separated, both shock shafts should also move exact the same way out depending the amount of rebound you gave them.
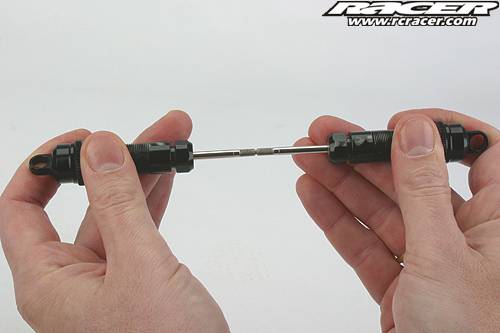
If you experience differences between both shocks, you should refill them until they are as equal as possible.
If one shock shaft compresses more easily: add oil
If one shock shaft compresses less easily: remove oil
Too much rebound: remove oil
Too little rebound: add oil
Every time you refilled a shock make sure to let all air bubbles escape from the shock body and recheck rebound and compression.
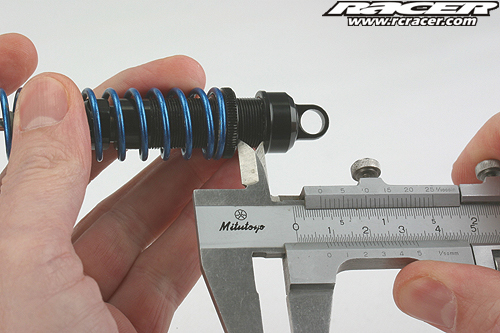
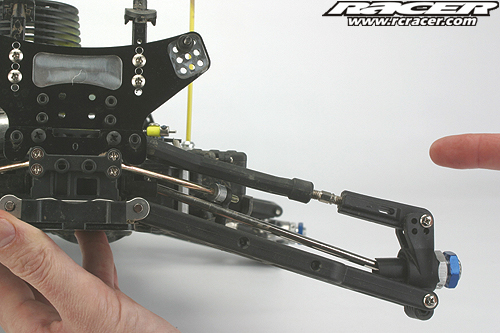
Length Counts
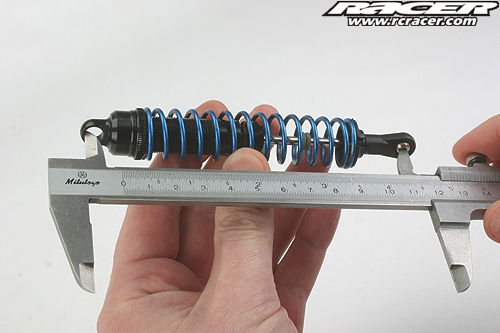
Now it’s time to complete the shocks with the ball cups that attach to the lower wishbones. Make sure you screw them on the same way on both shocks. Check the length of each shock afterwards. Use a calliper and measure between the hole in the shock cap and the ball cup. Measuring the overall length can give wrong results as you might have flash on the ball cups that add to the overall length. Therefore ‘clamp’ the calliper as seen in the picture.
If the shock length differs screw one ball cup in or the other one out.
Spring time
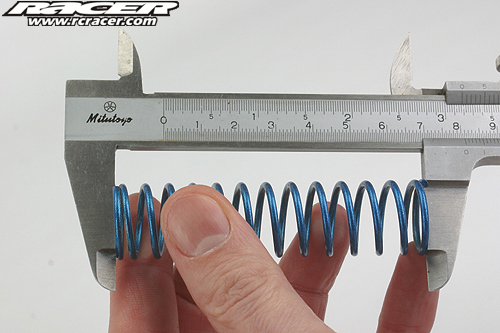
With the dampers assembled the shock springs need some attention. When fitting them make sure they are of the same length and spring rate left to right. Normally front springs are a bit shorter and/or harder than the rear ones. If you are unsure about the length and/or the rate compare their length and hardness. When you put two springs together just like we compared the shocks in the chapter above you will notice a difference in length when compressed in case the hardness of the springs differs.
With the spring and spring retainer mounted pre-adjust the spring preload according to the set-up sheet. This is done by spacers on the shock body or knurled nuts on the threaded shock body. Use equal spring preload left to right and readjust when fitted to the suspension. On off-road buggies and trucks it’s ok to just check the ride height left to right for the correct spring preload. On-road cars require a so called tweak board for added accuracy. We bring you a special feature on tweak boards very soon.
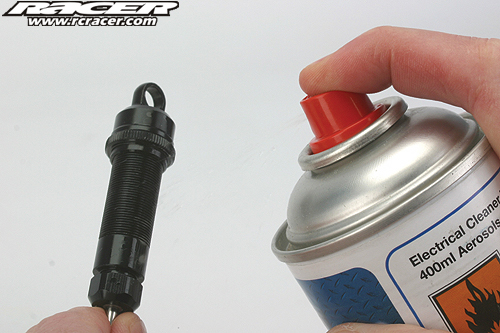
Clean them up
Before and after re-assembly, the shocks should receive a good clean with denaturized alcohol or motor cleaner. Spray it on and rub away excessive oil that may have leaked out of the shock cap. The reason is easy: oil attracts dirt which may then harm the shock body, the springs and even the O-ring seals.
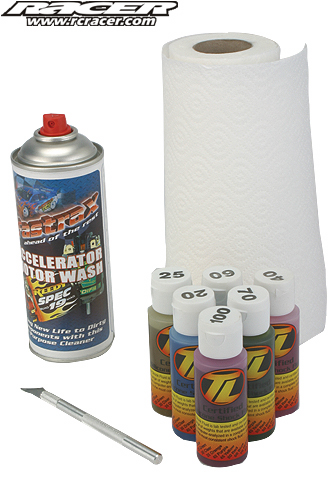
Tools
Beside the tools you of course have in your pit box like X-Acto knife, calliper, pliers, an assortment of shock oils, Team Associated Green Slime and possibly other tools that match your car or truck there are one or the other helpful things that make rebuilding shocks easier.

Associated, Losi, RPMand a range of aftermarket companies offer shock stands that hold at least four shocks when filling them or to put them aside when you wait until the air bubbles have left the shock body. There also is the Team Losi shock matching tool for most 1:10 scale on and off-road shocks that makes matching shocks very easy.
Free up
It doesn’t make any sense at all to precisely build and match the shocks if your car’s or truck’s suspension is dirty, worn or tight. Clean and check all parts including all suspension pins, the pin holes in the suspension arms, wheel carriers, ball cups etc.
Replace worn, bent or broken parts with new ones and make sure the suspension drops under its own weight when lifting the suspension arms and letting them fall down. If the suspension of your car or truck is tight from new use reamers like the ones Hudy offer to widen the holes in the suspension arms.


