


Build Complete – Tamiya Avante 2011
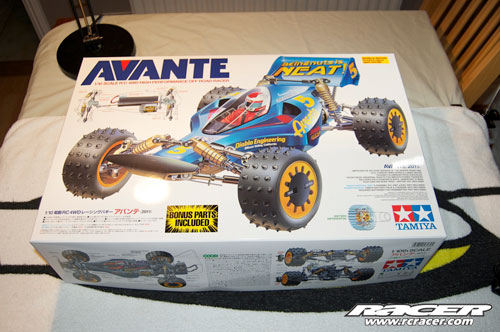
So here it is! The kit everyone said they wouldn’t re-release (even Tamiya themselves!) At ADH Publishing, we’d been pushing Tamiya personally to bring this kit back due to its iconic status amongst RC fans, and thankfully our requests didn’t fall on deaf ears. We are actually having to pinch ourselves to check this really is a NIB Tamiya Avante that isn’t based on a modern chassis or having cost us $2500! Amazingly though, this is the real deal – a real Avante (with some tweaks), and also the first one in the UK! Get ready as we visit every RC fan’s guilty pleasure…
Part One
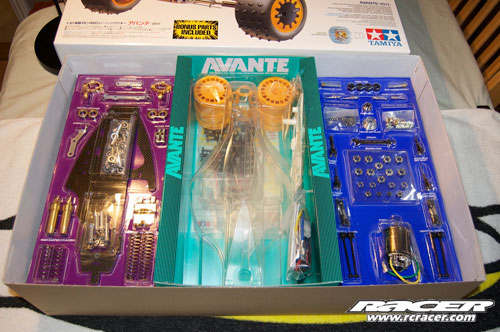
Not only is the box art like the 1988 original, but so are the blister packages underneath! This model also includes ‘bonus parts’ – in this case some 2.2″ racing wheels which should be easier to find tyres for…
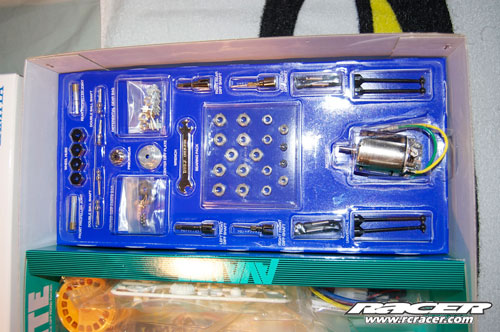
A close up of those blisters, with their descriptions. Are those CVD driveshafts I spot? One thing that let down the original Avante were the dogbones, and UJs were a sought after and expensive hop-up. Nice to see the dogbones weren’t re-released!
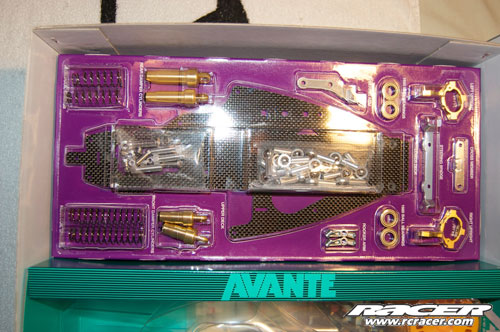
More goodness in the shape of carbon for the chassis plates rather than fibreglass and the front knuckles are now machined aluminium rather than cast. The colour also matches the gold shocks, which is a nice touch.
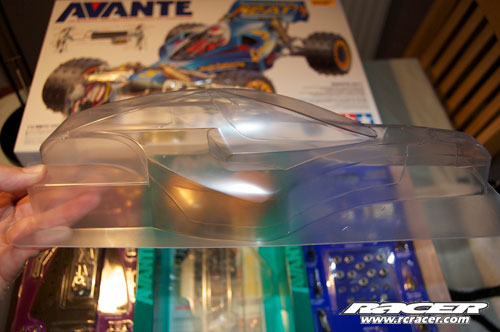
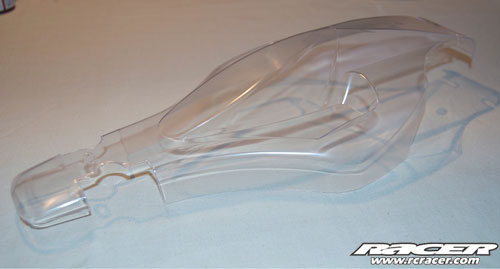
The body returns unchanged too. What a shapely design it is too. In the name of aerodynamics and functionality, modern bodies just don’t look anywhere near as nice do they?
Part Two
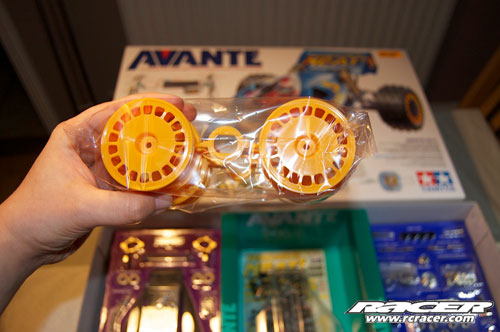
Here are the bonus wheels. They are standard sized 2.2″ racing wheels that are narrower at the front unlike the unique cam-lock Avante ones (also included) that are the same width front and rear.
Cool detail on the parts box!
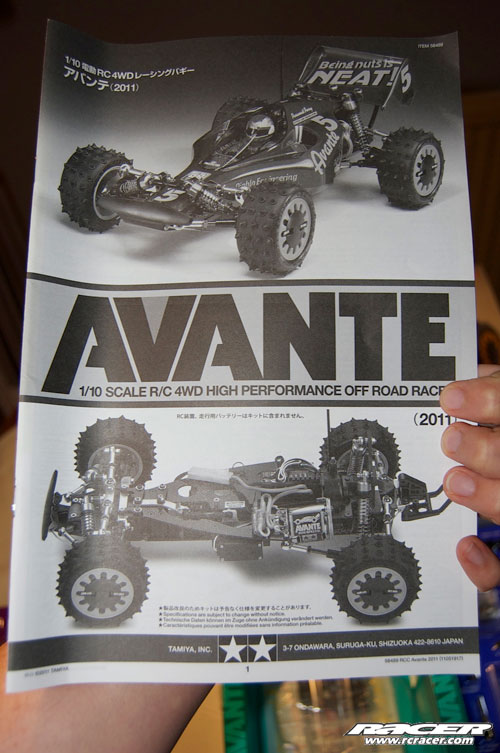
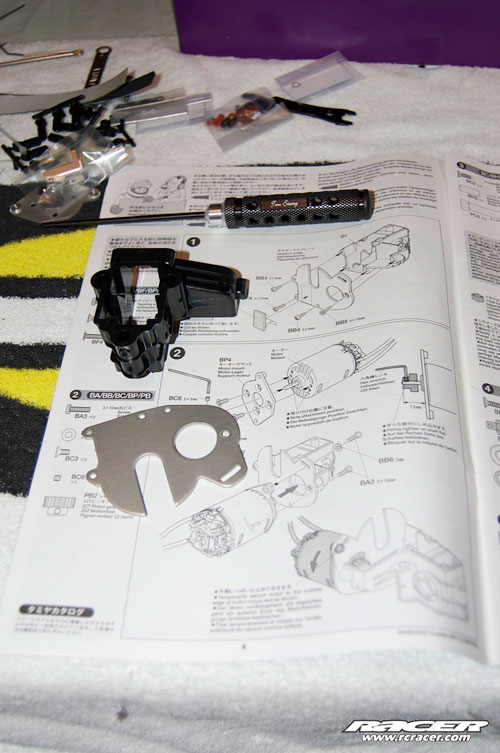
And so to the manual. Some parts are lifted straight from the original, but many sections had to be totally rewritten due to tiny detail changes. Typically Tamiya, you don’t have a supplement, but a completely new manual.
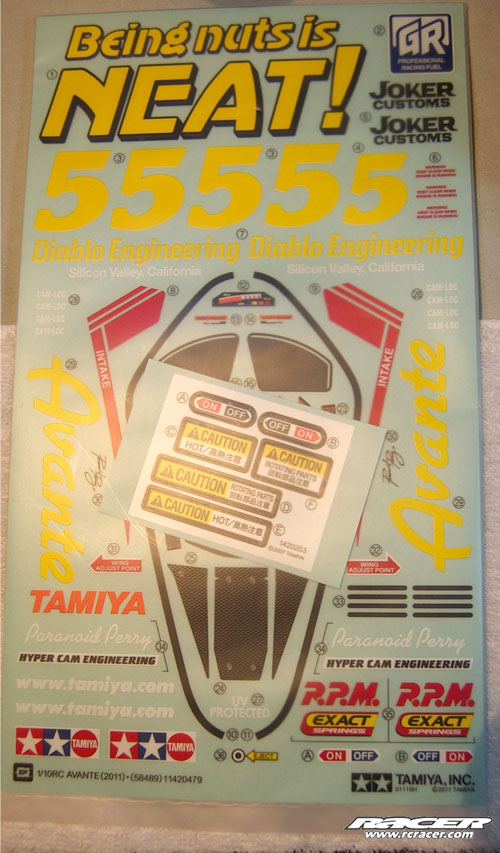
“Being Nuts is Neat!” The decals return, but sadly for copyright reasons, some have been changed. No more “Spacetech Engineeringâ€, sadly we have to make do with “Diablo Engineeringâ€.
Oh well, at least Paranoid Perry is still here!
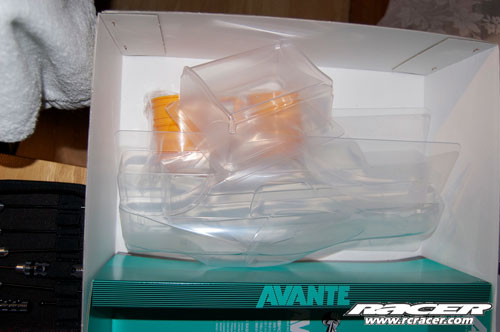
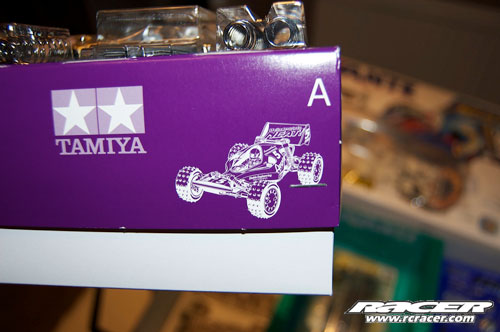
Lobbing the body, undertray, wing and wheels in the box for a moment, we open the Parts Box A…
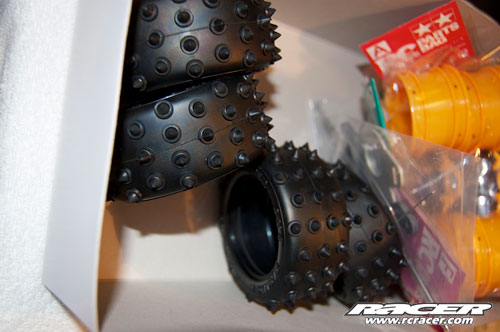
…which smells incredible! The smell of the tyres takes us back to the late 80s and early 90s…
But enough reminiscing, over the next couple of nights we’ll be building the Avante up and sharing the major assemblies as they get built and bolted together.
Stick here at www.rcracer.com for the first UK built Tamiya Avante 2011!
Part Three
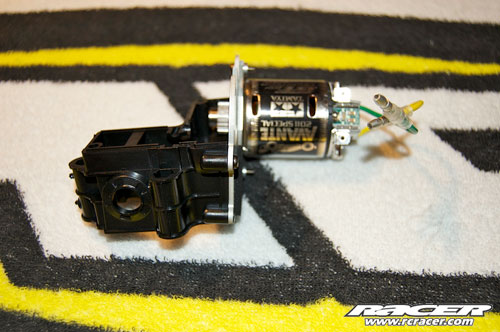
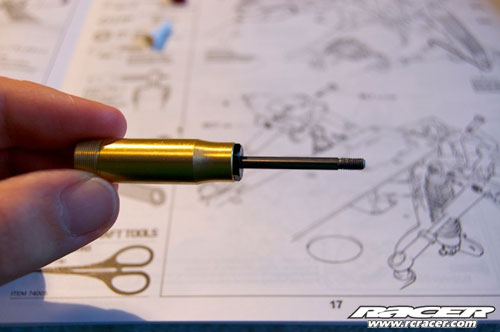
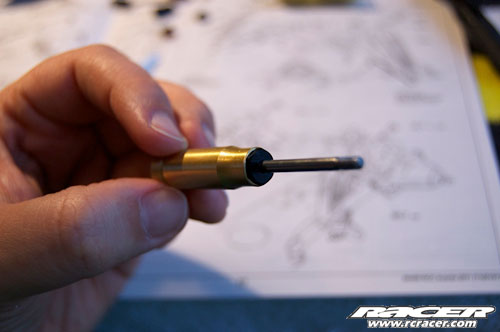
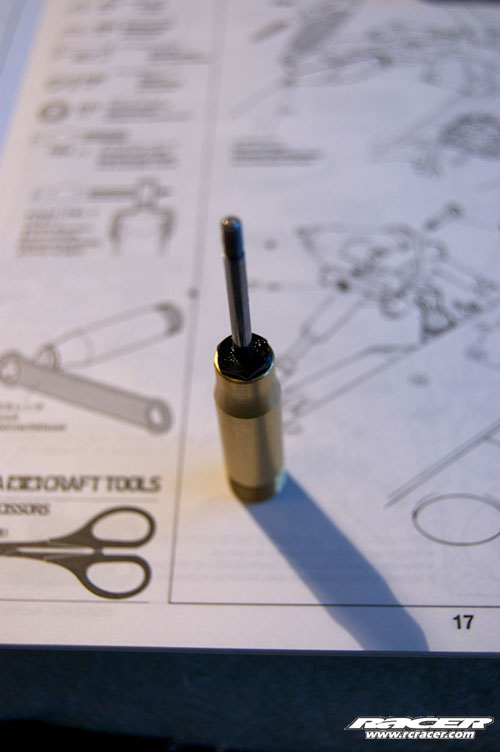
As we continue the build, it’s time to start adding the special Avante brushed motor. Unlike the Technigold unit of the 1980’s, the new motor is far more up to date with conventional brushes, surface mount capacitors and a more normal looking can. First job though is to mount it to the rear gearbox casing.

The carbon chassis plates need sealing before use with superglue.
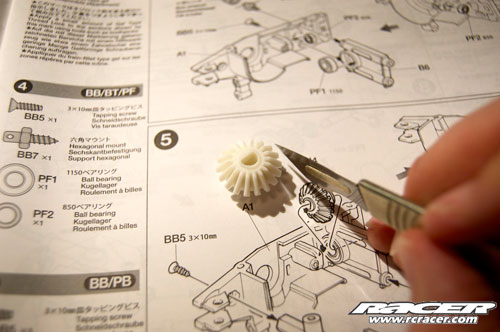
As you wait for the glue to dry, it’s best to get busy cutting out some gears carefully, remove any plastic flashing that might bind the drivetrain.
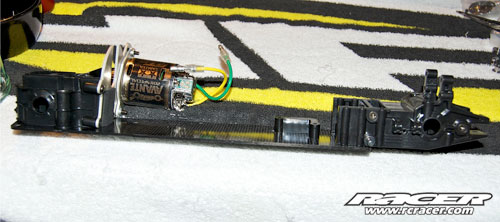
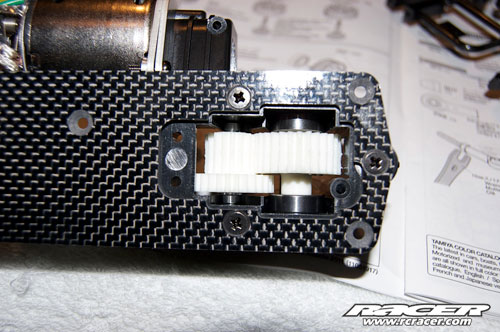
The front and rear gearbox casings are then bolted to the lower chassis plate.
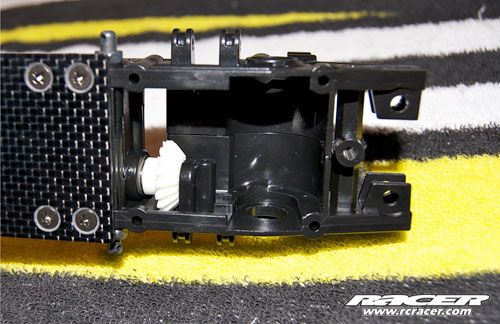
A close up of the front gearbox showing the bevel gear that transfers drive from the propshaft. Join us tomorrow as we start moving on to building the gearboxes…
Part Four
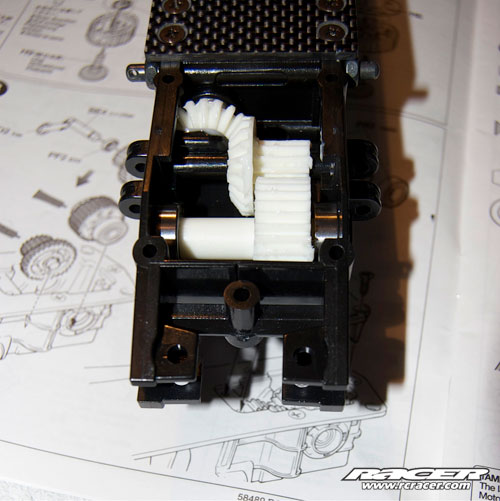
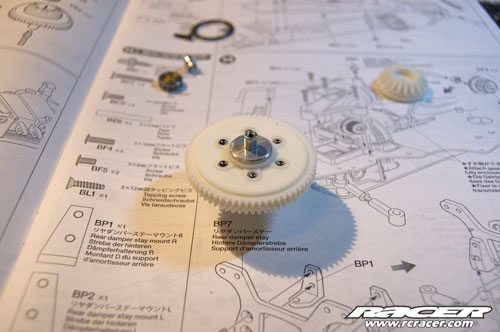
A six-gear diff features in the Avante rather than the normal five-gear unit. A little jig is used to build the internals so don’t forget to remove it before you fit the diff in the gearbox!
Next job is to pop the diff and the reduction gears into the rear gearbox before sealing it all up. A good coating of Tamiya’s ceramic grease helps to keep everything quiet and smooth running…
These bearings go in the front gearbox and are absolutely tiny!
A close up of that front gearbox and all its gears!
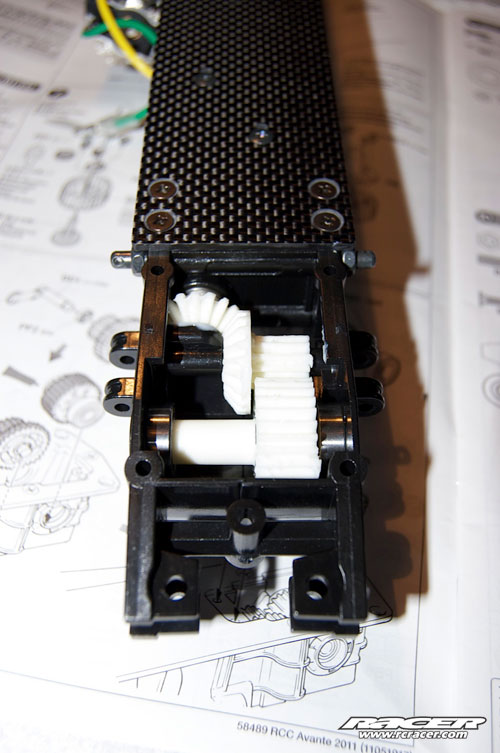
The gearbox is full of gears unlike the simpler drivetrains used in modern racing buggies. A set of bevel gears and reduction gears are used, the latter running on those tiny bearings above. The Avante may have been a very forward thinking design back in 1988, but it’s pretty inefficient.
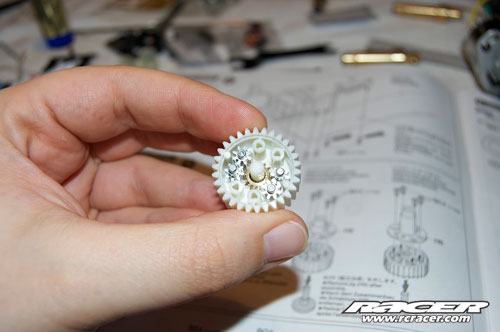
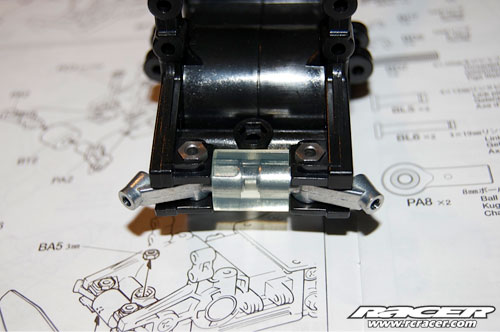
The spur gear features an integrated ball diff. This gives an element of give in the drivetrain and also provides a centre differential action. It is true to the original, but we can’t help thinking a DF-03 centre slipper clutch would have been more useful on the track!
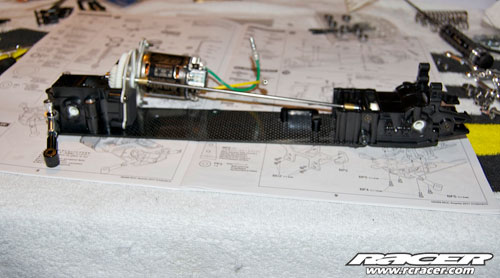
Centre diff in and the two gearboxes can be joined up with the high mounted steel propshaft. It still doesn’t look like an Avante now, but it’s getting there!
Part Five

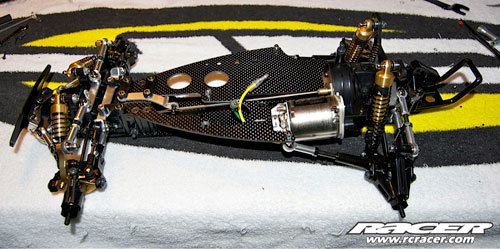
Welcome back to Racer’s build of the 2011 Tamiya Avante. Our artistic director (Greefy) has said we should stop taking pictures on this pit towel as readers won’t be able to make out the fine detail of the chassis.
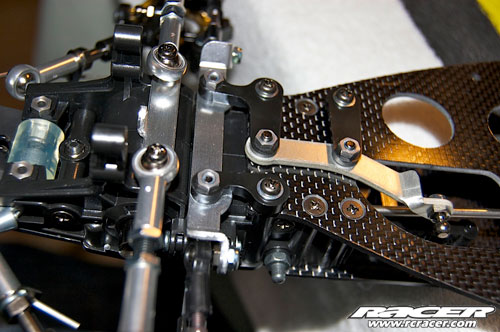
Good point Greefy, please wash the plain one then! Anyway, next step was to put the top deck on, again, gorgeous carbon fibre is used for strength and light weight. It’s starting to look like an Avante now we feel…
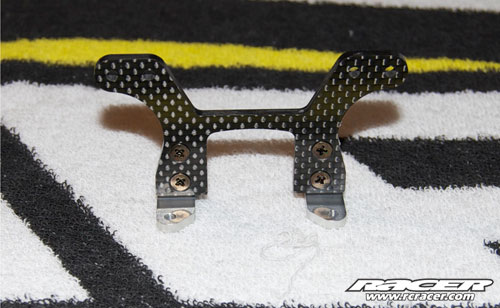
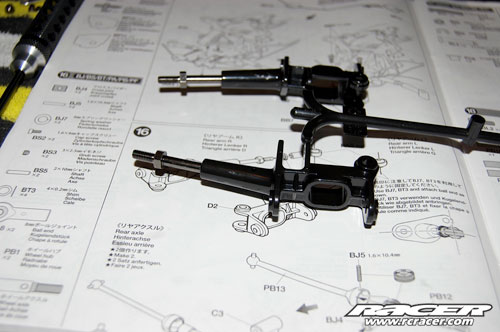
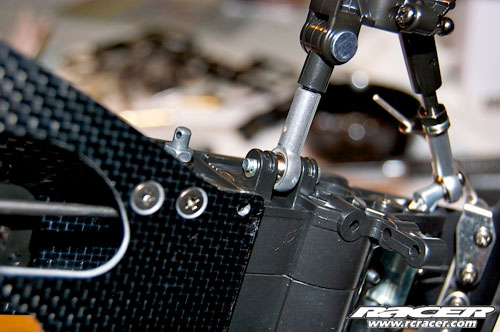
The rear shock tower is also carbon, and is now fitted with machined alloy supports as this was a notorious weak point on the original…
The front knuckle sprue is now taken out of its packet. Unusually the front metal tie rod style links are pre-fitted in the plastic part.
The same goes for the rear too… These are the next parts to be fitted, and two of Avante’s trademark metal rose joints will get screwed onto these next.. What incredible quality this kit is.
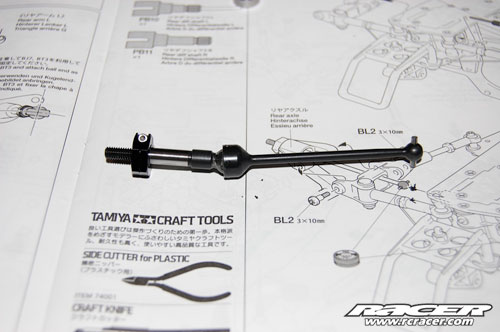
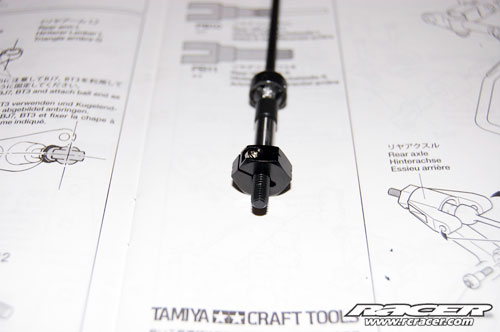
The old driveshafts with their splined axles are brought bang up to date with these TRF style CVD shafts. Onto these go TRF clamping hexes. These are normally an option on Tamiya kits – not here though!
Another shot of those hubs. Any 12mm fitment wheels are compatible, although these are a bit harder to find in the UK, where buggies tend to all use a pin fitment.
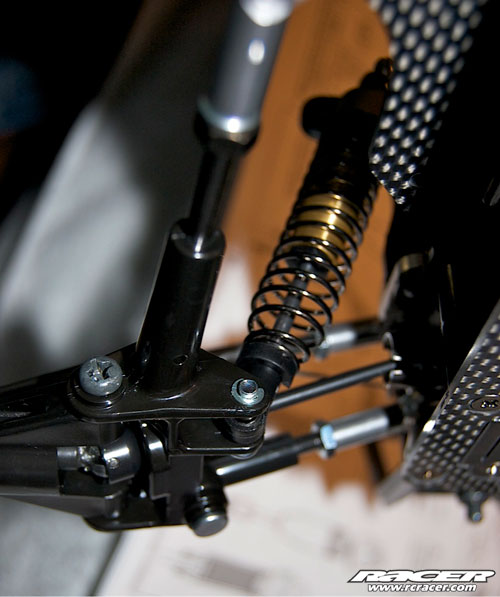
Time to bolt on the shock tower, rear suspension links and driveshafts.. It’s really starting to take shape now.
Not forgetting the retro rear bumper too.. Join us again soon as we tackle the front end and start fitting the dampers (hopefully with a new pit towel)
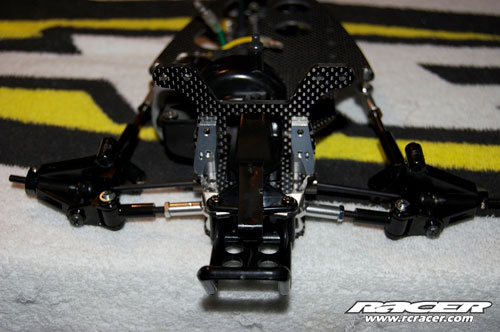
Part Six
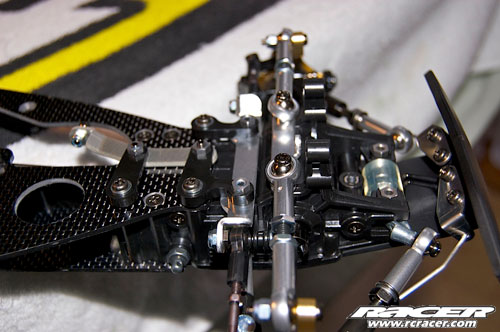
With the gearboxes built, it’s time to move on to the suspension. This clever little system allows the suspension to have some ‘give’ in the event of a front-end impact.
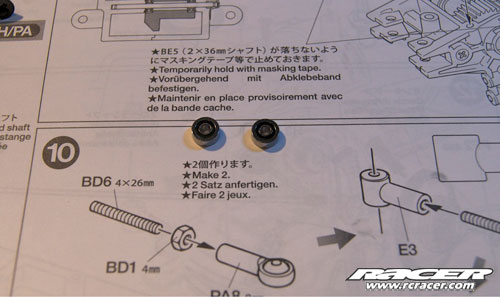
The lower wishbones/links then attach to this mount, with the rear mounting holding the front gearbox layshaft pin in for some reason. If you used tape to hold this pin in temporarily earlier, you should now remove it.

The rear pivot is held on by a fiddly E-clip. It took far too long to attach, but hopefully it won’t have to be removed in a hurry!

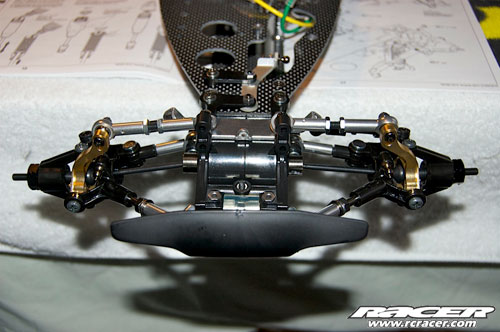
Top view of the lower wishbones, now both fitted and including the anti-roll bar.
The front gearbox is extremely low profile – one of the design aims of the Avante. This shot shows just how compact the front gearbox is.
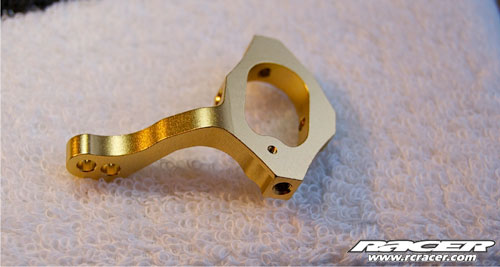
The next job is to fit the front knuckles, which was one of things that everyone remembers about the Avante, mainly due to their complete lack of robustness! The 2011 model features these machined versions which are bound to be much stronger.
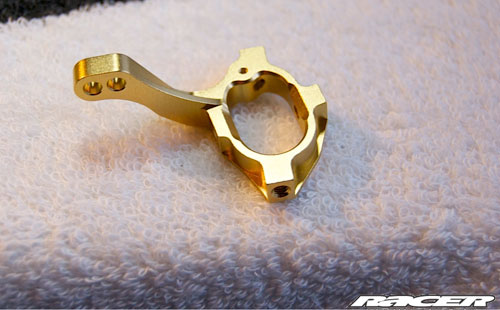
The shape is actually a lot more simple than the old cast ones, but the gold colour makes up for this we reckon…
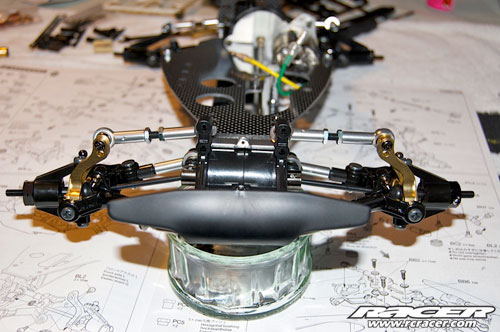
Knuckles and hubs can then be fitted, along with more lovely CVD driveshafts and clamping hubs.
A close up of the front suspension.
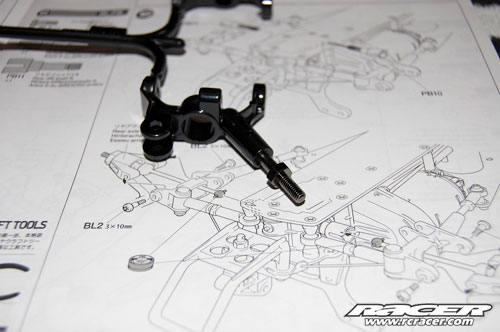
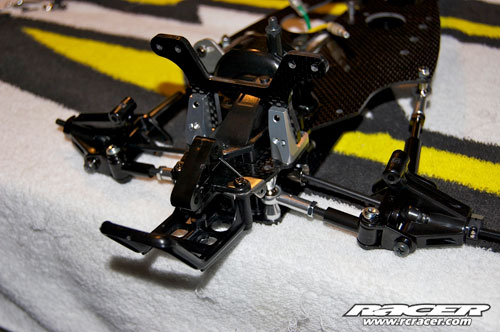
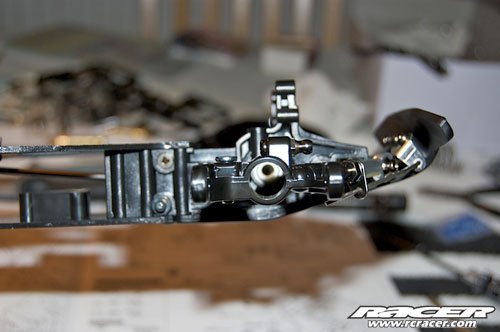
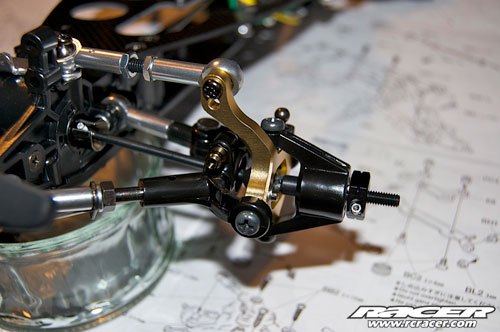
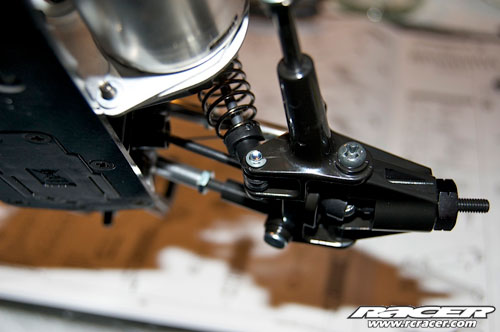
Next job is to fit the steering components. This is a pretty long and drawn out job due to the massive complexity of the system..
The reason the steering is so complex is because the servo is mounted quite far back in the chassis, thus needing a serious linkages to transmit the steering action forward. Why Tamiya didn’t just use a long turnbuckle like their modern chassis is beyond us, but it looks impressive if nothing else!
The other side of the steering bell cranks are shown here and finally the Avante is starting to look like a rolling chassis. Sadly this is all we have time for this instalment so join us next time as we start building the dampers and then add the wheels and radio gear. Remember to keep it here at www.rcracer.com
Part Seven
The dampers are one of the other things on the 2011 Avante to be updated to make them more reliable and easier to use. Rather than using a C-clip to retain the seals, these dampers have a screw on bottom cap more like a modern TRF damper.
The bottom cap is pretty subtle though so the units still look true to their roots.
These are the fronts, which are tiny!
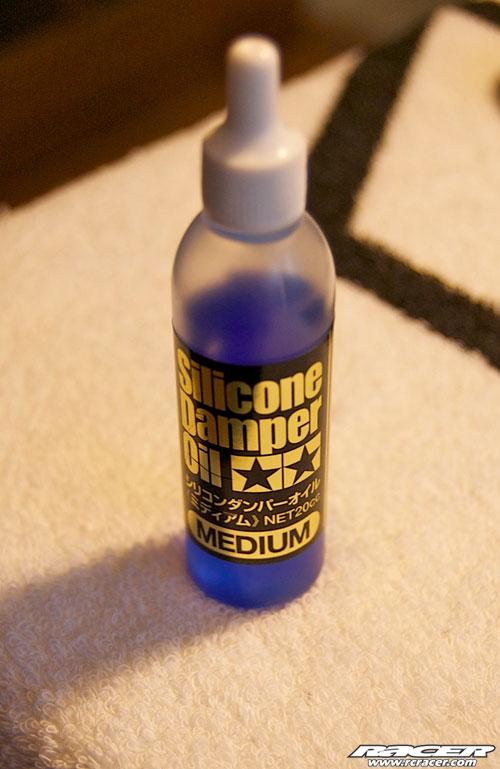
Tamiya do provide some of their awesome silicone oil, in medium weight, which is close to 30/35 weight in our experience.
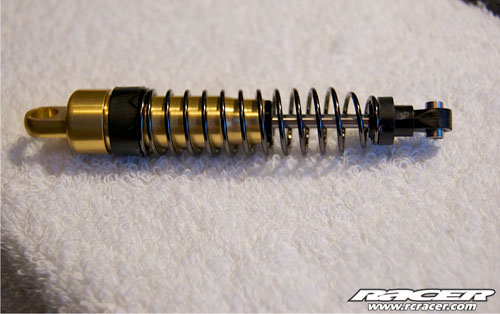
A completed rear damper. Check out the tapered springs, the latest fashion in off-road racing it would seem, but featured on the Avante in 1988!
Sadly, there are more super fiddly E-clips in residence holding the bottom of the damper in place. It must have taken 15 minutes to get this clip on!
This suspension is unlike anything else though it has to be said. RC car manufacturers were very fond of their E-clips in this era unfortunately.

The mounting at the front is a bit more conventional with ball joints locating the bottoms of the dampers. The gold shocks match the gold knuckles perfectly!
Pretty much done now. The next stage is to fit the radio gear. If you’re wondering, Racer’s Greefy did not wash the plain pit towel and we were desperate to keep building! Of course we will update this review with some studio shots once we get it to back into the ADH Publishing offices.
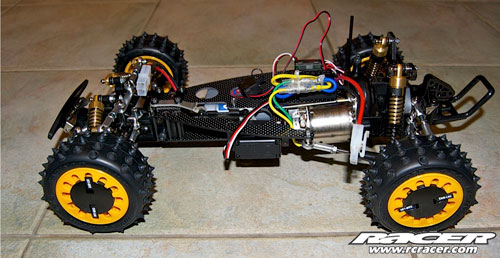
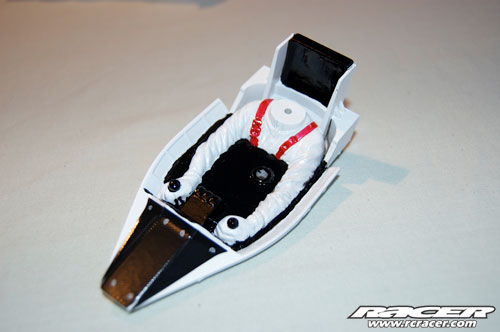
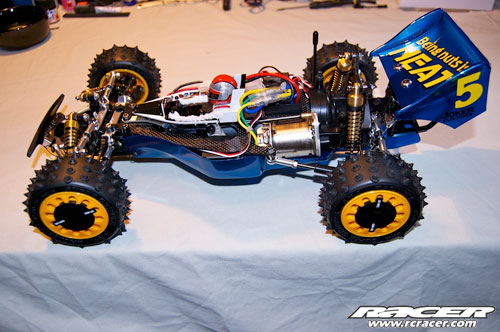
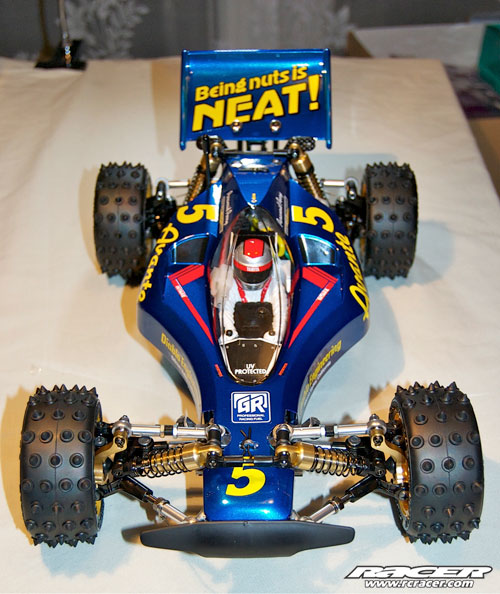
Radio in, but still messy. Somewhere in the box Tamiya supplied some tie wraps, but they are under mass of empty poly bags! The cam-loc wheels have also been fitted and look fantastic!
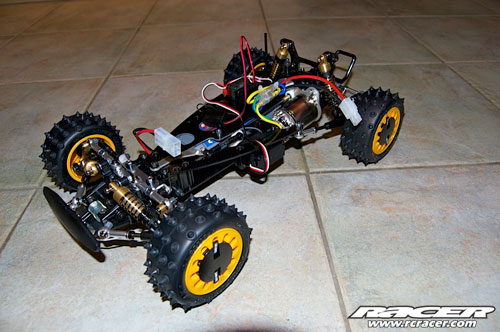
Time for a quick test on the floor to check it all works…

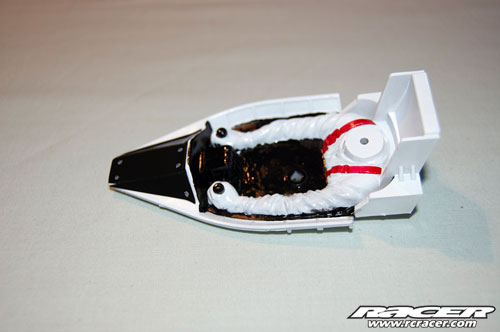
The battery mounting is pretty neat, and can be removed with one body clip. It also sits quite central in the car helping the weight distribution…

As you need to affix a driver figure to the top deck, we fitted a tiny Spektrum micro receiver to go with the servo and this neatly fits to the right of the included Tamiya speed controller.
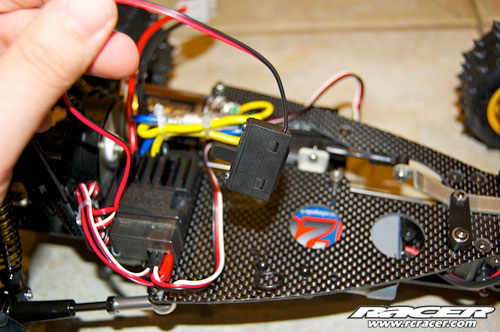
Just need to find somewhere to mount the large on-off switch!
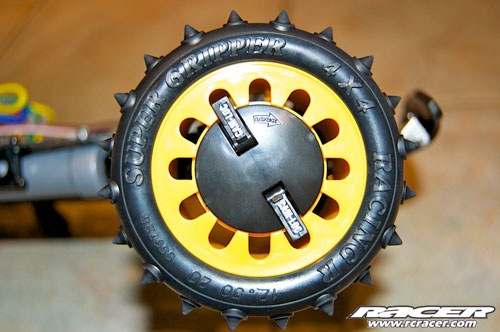
A gratuitous shot of a cam-loc wheel. No wheel nuts here folks!
The next steps are to tidy up the radio install, glue the 2.2″ racing tyres and paint the body shell and driver. Until next time, keep www.rcracer.com bookmarked.
Part Eight
Attention now moves to the body, wing and driver. First up, time to get busy painting the body of “Paranoid Perryâ€, the Avante’s driver. We’re not sure why he’s paranoid, maybe because the other buggies he’ll be racing have no driver figure and he’s worried he’d be out of a job…
The manual says to paint Perry in red overalls, but we preferred “The Stig’s†white look. Painting the driver is a tricky and time-consuming job to say the least…
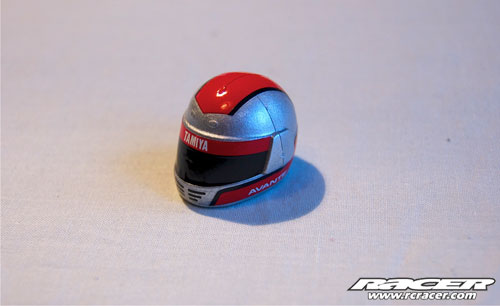
The helmet needs to be painted silver before applying decals for the red stripes and visor.
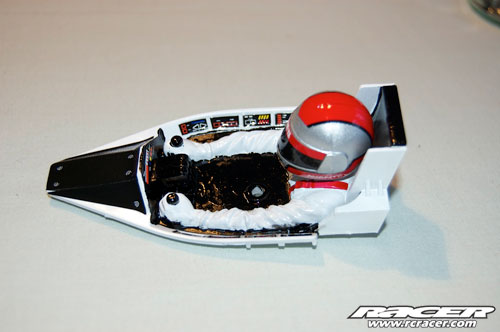
A few decals in the cockpit jazz things up a bit and the completed assembly can now be fitted to the car.
Now to wash and mask the shapely Avante body. Cutting out is again a tricky job, especially around the nose.
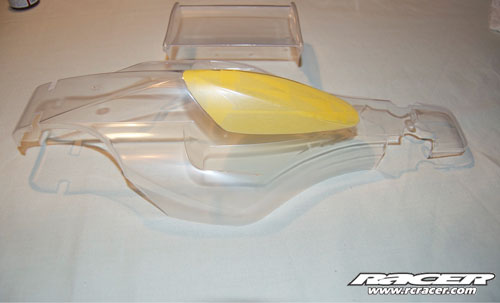
The window needs to be masked manually as one isn’t included in the kit. Luckily, its a simple shape and not too big. We used Tamiya’s excellent 6mm wide masking tape.
A few coats of Tamiya blue (PS-16) later and it’s starting to look like the legendary Avante! The wing is comically narrow compared to modern buggies, but works perfectly here. In the final part we will be mounting the body, wing and undertray and applying the decals, so be sure to join us again on www.rcracer.com
Part Nine
In our last update, we had finished detailing the driver figure and given the body, wing and undertray their first blasts of paint. With a few more coats, it was time to pull off the overspray film and test fit the body on the chassis in order to make any final cuts and ream the mounting holes.
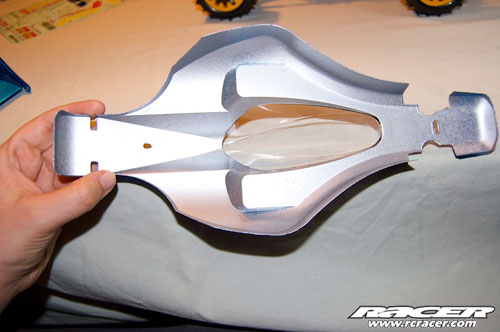
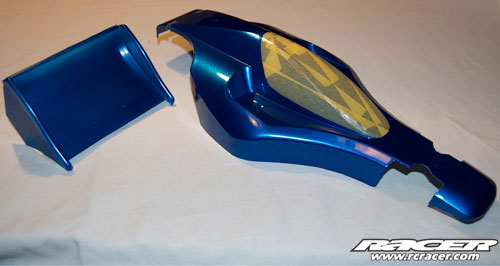
The body was backed with silver to make the paint stand out better – just a light coat suffices.
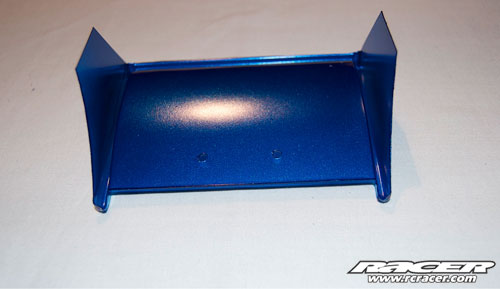
The wing and undertray should be left blue though as the underside is still visible. About 5 coats of spray is enough to prevent too much light bleed through the un-backed paint.
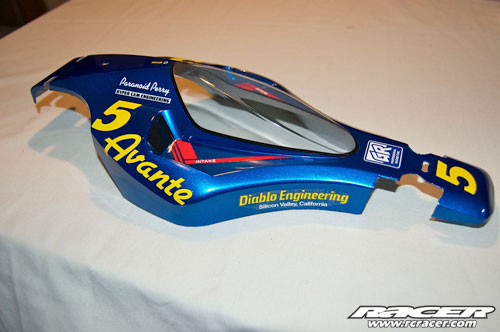
Decalling is something you should spend plenty of time doing to ensure the decals are symmetrical and evenly applied. There aren’t too many decals, but the Avante logos on the flanks are a little tricky due to the multiple radius side pods.
Wing and undertray fitted.
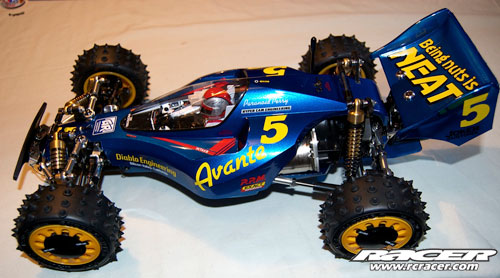
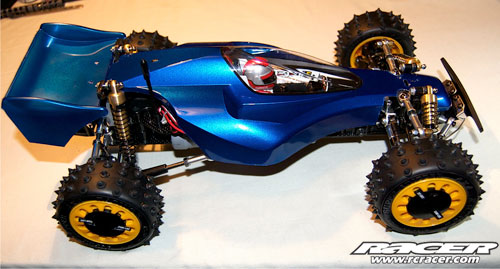
….and finally, the cherry on the cake is the body itself. It really is staggeringly beautiful.
If “Being nuts is neat,” the Avante is the super jumbo family-sized tub of peanut butter (with crunchy bits!)
We hope you’ve enjoyed our build up and as the car now goes off to the studio for some high resolution pictures, our team of writers (some of which were on the Tamiya racing team in 1988) are getting busy writing our special Thrash Test that will be in our May issue. There are bound to be some surprises in the write up, so make sure you pick up our April issue for the complete lowdown!


Excellent work! This looks awesome! I have just one question… on the paint job, you mention using Tamiya PS-16 as your main color but you also claim using silver as a backing… any particular silver?
Hi Keith
Thanks for the comment.
As it is for backing the specific colour doesn’t matter. We would recommend using Tamiya though as ideally we would recommend sticking with the one paint brand.
Hope this helps…
Cool. I still have my original from Xmas 88 and it works fine and still in good condition. Is it worth much? It’s the gold motor with metalic blue shell.
it is worth as much as you want to charge as its extremely rare. £500-1200 id say.