


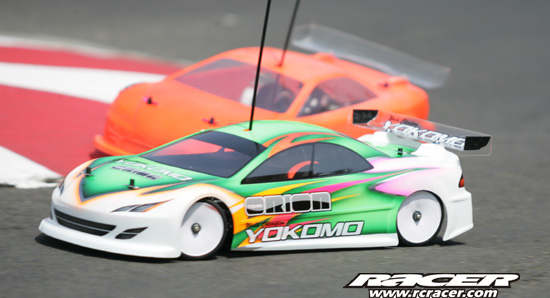
Body Beautiful
Racer runs through the process of cutting out and fitting a bodyshell to your touring car for the best performance and durability.
Correctly fitting a bodyshell is very important for your touring car handling and the way it works as part of the whole package. Its position on the car can have a huge affect on the handling and it may create other problems for you if the tyres rub the arches or it sits improperly on the mounts.
Racer looks to offer you a thorough guide as to cutting your shell out for durability, making the correct holes for the posts, as well as outlining alternative positioning for the shell to alter the overall feel on the track.
At present, there are many different choices of bodyshell manufacturer let alone styles and models. You can choose from GT designs, two-door coupes or four door saloons, trucks and many others depending on your preference or class raced but all share the same issues regarding correctly mounting the shell.
Painted or Not?
There are two main methods we use to mount bodyshells and this mainly depends on whether the shell has been painted. The preferred method for us is to drill the shell to fit the chassis before painting. This way the positioning required by the posts can be seen more accurately as the bodyshell is see through. You can, when the ideal position is found, mark and drill small pilot holes or wade straight in and drill the correct sized holes for the posts. This method then allows you to sit the body at its correct attitude on the chassis and see the centres of where the wheels lie. Before painting, I then generally mask a 20mm square with the wheel axle at its centre so that when the painted shell is dropped onto the car, the axle centres can be seen and the wheel arch cut in the right place. This means that the shell can be painted without being cut out, which makes masking easier as the body is not constantly flexing, which in turn lifts the masks. However, on some manufacturers bodyshells, the wing endplates are part of the front wheel wells so in this case, it is best to mask the whole endplate off and then paint them when the shell has been cut out and they are separate.
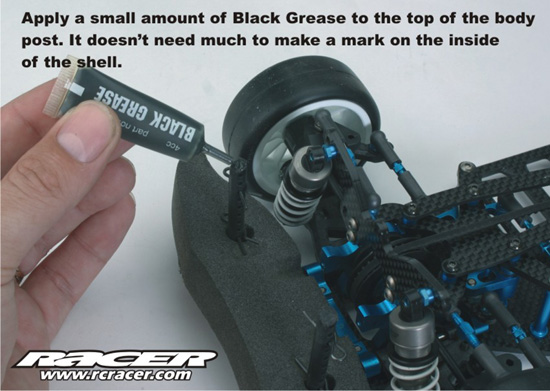
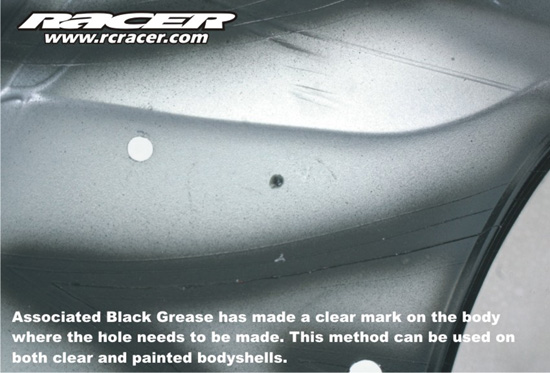
All these theories go out of the window if you or someone else has painted the body before the mounting holes for the posts were ascertained. One of the previous best methods for sorting these positions was to work out where you wanted the shell on the chassis, then remove the body and put a dab of black grease on the top of each body post. Then slowly lower the shell down onto the chassis in the required position and when the body makes contact with the post a small grease mark will be left on its underside, indicating where it should be drilled. A recently introduced product in the form of Trinity’s ‘No Brainer’ body locating tools however do the same thing as the grease. Put them on top of the body posts, locate the body and push down, and the No Brainer’s points will leave an indent in the shell – simple but very effective method. Before all this is done though, it is best to mark a board that the chassis is positioned on with the wheel centre lines as it will more accurately allow you to position the centres of the unseen wheels in the arches. Most manufacturers shells are a generic fit and the centres of the arches on the shell may differ slightly from the wheelbase of your car. It is best to align the front wheels in the centre of the front arches and then position the rear accordingly.
Rules are Rules
When the mounting holes are drilled and the shell drops onto the posts on the chassis the correct height for the body has to be sorted. There are minimum body heights set for BRCA sanctioned events and the Super Touring height especially means that most shells have to be mounted higher than the manufacturer intended making some look a little silly, but it’s the rules! When you have worked out where the shell needs to be height wise, then the lower cut lines can be marked. You will probably need to cut off the excess return on the moulding to get it to the correct height so this can be measured. As a recommendation, go for 5mm above the ground surface level. Mark this on the body, then use a ruler to join the marks on the side and the lower cut line around the front to mark your cut line parallel to.
The actual cutting of the body can be done in one of two ways. The most popular method is by using curved scissors, designed for lexan. These are offered by many manufacturers and are a simple and easy way to accomplish the task. It is also a lot safer than the other method which is to score round the desired cut line with a scalpel, then bend the shell in the area of the scored line and tear the excess material away. Errors can happen easily this way and it is quite easy to score ‘off target’ so to speak. So if you’re not confident with sharp implements, go for some of the curved scissors.
Arch Techniques
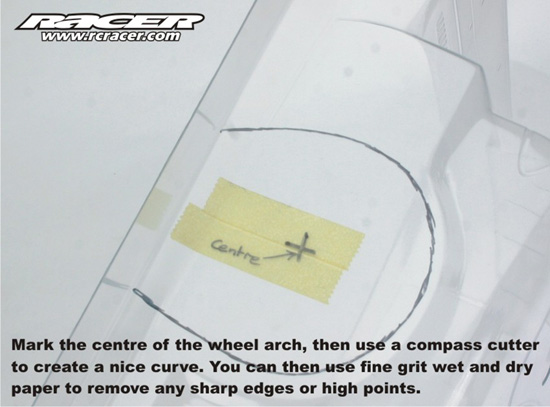
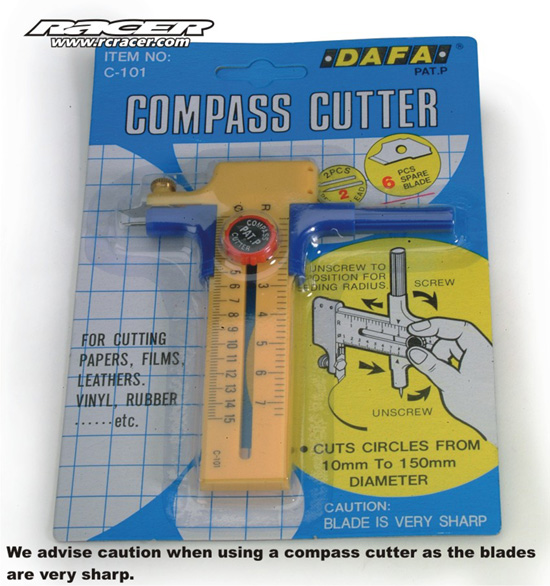
Once you have got the body sitting at the right height and ground clearance you can cut the wheel arches. Some manufacturers provide an arch template with the shell but you can also use a wheel and tyre by aligning the centre of the wheel with the axle and drawing round the outside edge of the tyre. Another alternative is to use a compass cutter, again using the axle as the centre for the arch. These will score a nice line, which then needs flexing and tearing the excess material away from in the same way as cutting out with a scalpel.
More Holes!
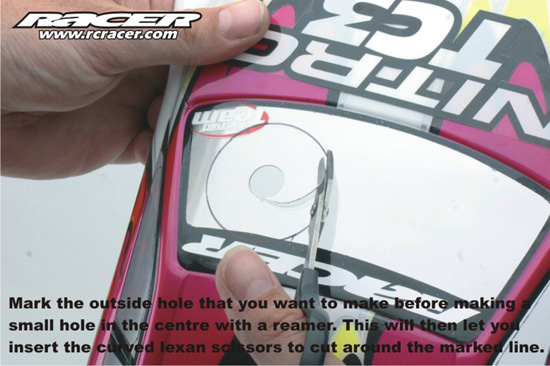
For nitro cars there are also additional holes that can be cut in the shell for air flow and access. Going by the BRCA National rules, you can cut out a 50mm diameter hole in the windscreen, the front side windows and remove the rear window as well as other smaller holes for glow plug access, etc. Taking each of these in turn, for the aperture in the front screen it should be positioned to give the best access for refuelling and good airflow to the engine. Mark the 50mm hole, then ream a hole in the centre of this, big enough to fit the tip of the curved scissors in to enable cutting. Then cut out in a nice curved motion around your marked line.
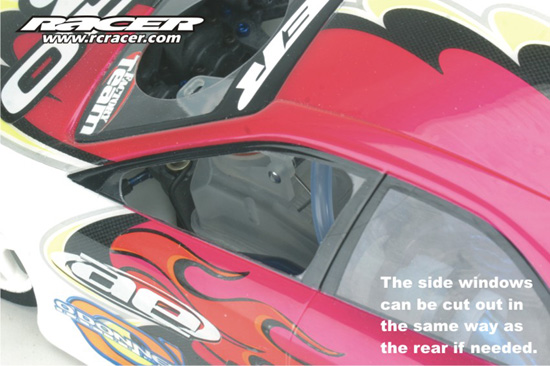
The side windows are best cut out by reaming a 10mm diameter hole in the three main corners of the window, in such a position that the edges of the holes border the window edges. Then, as before use the curved scissors to join the holes cutting along the window border. The reason for reaming the 10mm holes is so that there are not sharp apexes in the corners as this will cause tearing at these points.


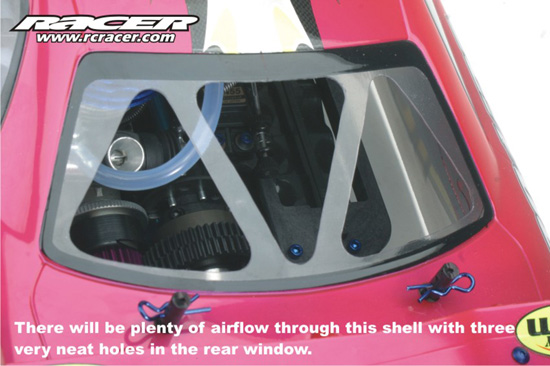
On the rear window instead of legally removing the whole window, cut three equilateral triangles across the window using the same method as for the side windows. Position them so that the three go across the rear screen, with the two end ones the right way up and the centre one inverted. This serves to give the body more rigidity with so much material removed.
Smoothly Does It
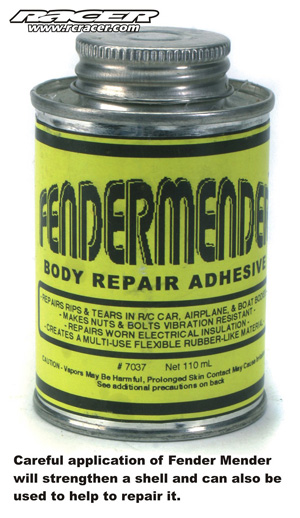
It is always worth gently running around the edges of any cut lines with a motorised tool like a Dremel with a sanding drum as this will take off and sharp edges where tears or cracks can develop. If you do not have one of these then gently sand the area with wet and dry paper and this will accomplish the same thing and in doing so, will help to lengthen the life of your bodyshell.


