


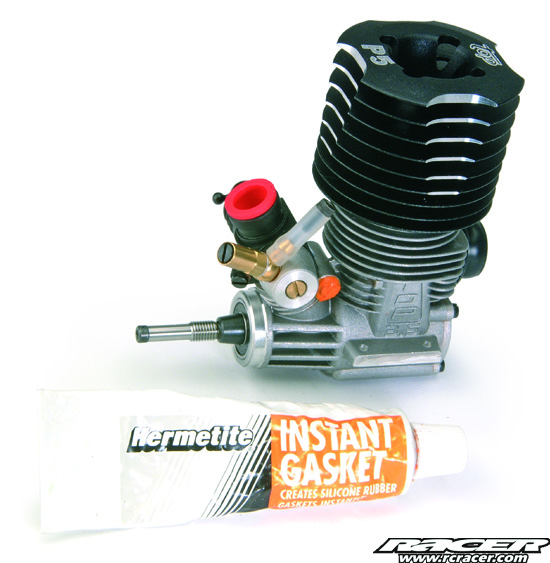
Make It Air Tight!
Eliminating air leaks is a sure way to reduce the chances of a temperamental engine. Here is our simple, step-by-step guide to sealing a modern 21-size competition unit.
We must first of all start by stating that this process is not a must, as the quality of a modern engine does not require this. But, as time goes on, the O-rings can deteriorate and regular use and maintenance can make an IC engine prone to air getting in.
Air in an engine causes all sorts of problems but mainly it will make starting the engine up harder and can cause engine cuts and general difficulties. So here at Racer, we normally seal an engine prior to use, especially of we are going to race it. It is more of a safeguard and means that if you do have engine problems, an air leak is not going to be the cause.
Equipment
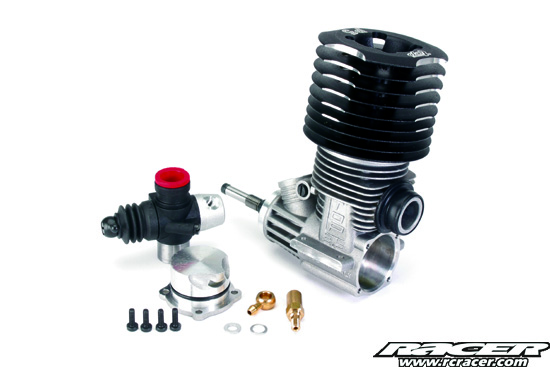
Naturally, you will require and engine to do this and it doesn’t have to be new as the same principles apply. In both cases, you need to work in a clean environment and be careful not to allow any dirt or sealant to get into the engine. If you are sealing and old engine, we would recommend a good clean up first and then as you remove the parts, check them over and give them a wipe down. With all the parts cleaned up, it will allow you to get on with the process in a methodical and organised way.
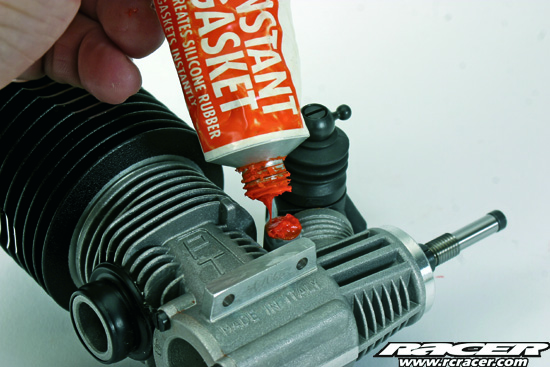
You will need to purchase a suitable Instant Gasket like Hermetite available through motorist stores like Halfords, etc. We use the bright orange, heat resistant type and it costs just a few pounds. You will also require a modelling knife, a flat bladed screwdriver as well as suitable open-ended spanner for the carburettor. Keep some kitchen roll or paper towel to hand for wiping excess sealant off as well as keeping all the components clean.
Strip The Engine
Remove the back plate by undoing the four screws and then take the carburettor off by undoing the pinch bolt.
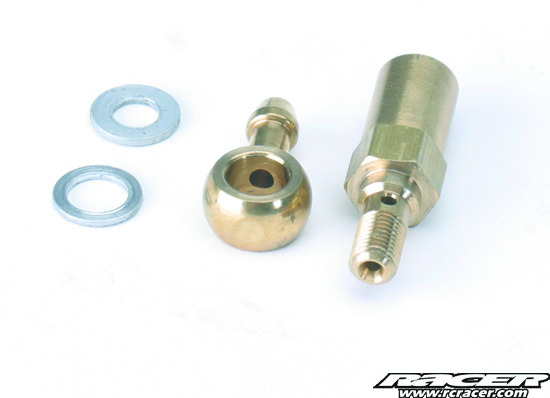
We also seal the carb banjo so the gold parts have to be undone using the spanner. Remove the both the washers and separate the banjo form the needle section.
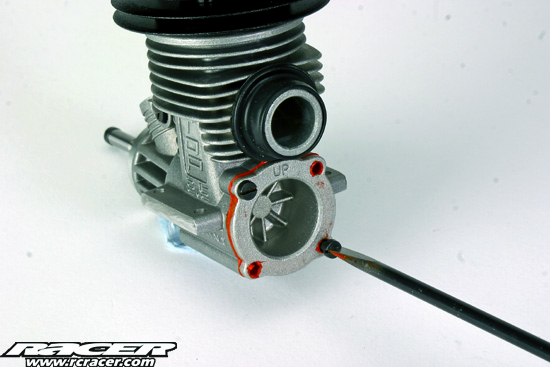
Sealing the Back Plate
You will notice that the back plate already has an O-ring to seal it but with a little sealer, you can make it fool proof. We recommend starting with this part as it is the easier of the two to carry out.
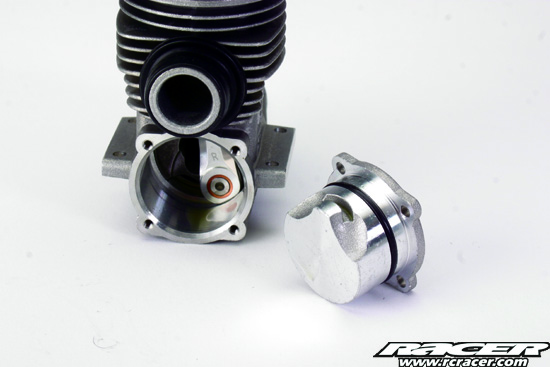
Smear a small bead of the sealant over the O-ring and against the vertical part that meets the crankcase. A little of the sealant will be pushed out when it is inserted and this should be wiped off. If you can find a suitable sized tool to apply and shape the sealant, all the best. If it does get messy though, just wipe the excess away with the kitchen towel.
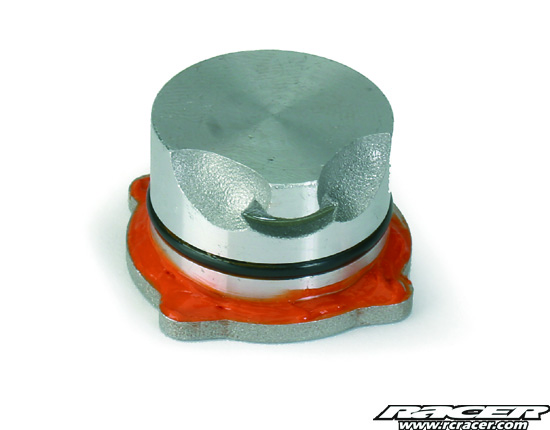
Replace the screws, usually four of them making sure that the back plate goes back the same way it came out. With this engine for example, it is made easy as they stamp the word ‘Up’. Normally though, any cut out on the inside of the back plate will be place towards the top.
Tighten the screws up going diagonally across with the first two to ensure the back plate is pulled down squarely before tightening up the other two. Do not over tighten these though as you don’t want to snap off the screw heads and also, the sealant will do its job anyway.
Carburettor Components
Like the back plate, we would place a fine bead of silicon around the needle part and then drop the respective washer in place. This is where the modelling knife comes in handy as these components are very small and the tip of the knife can be used to manipulate the sealant.
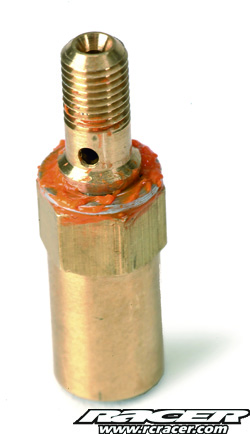
Follow this stage with sealing the banjo to the washer and then the second washer before fitting the completed unit back onto the carburettor body.
Please note that the banjo has a small hole in the inside of it where the fuel enters the carburettor so be sure to use as little of the sealant as possible around this areas as it could easily block that tiny hole. The two surfaces between the carburettor body and the gold assemble should also be sealed, being careful not to let any excess sealer get in the way.
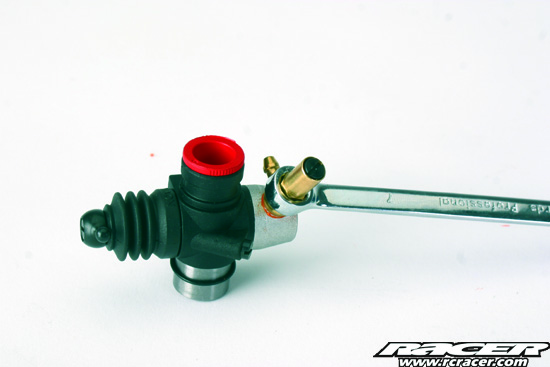
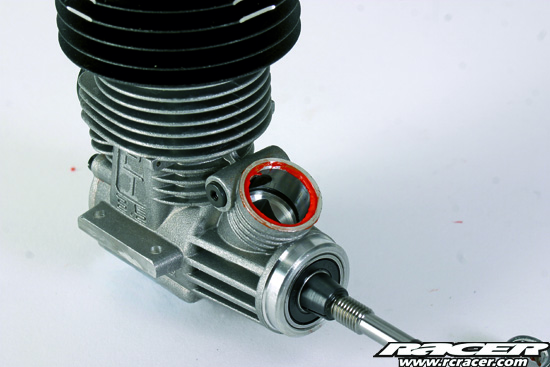
Carb to Casing
In the same way that the back place has an O-ring seal, so does the carburettor. In the past, we have seen the O-ring located in a machined slot in the neck of the engine casing or fitted to the carburettor. Some manufacturers opt to use two O-rings but you can still seal it. Follow the same process as the back plate, placing a neat beading of the sealant around the O-ring before pushing the carburettor into place.
You should then make sure you have the carb at the correct angle for the throttle linkage before pushing the carburettor down and tightening up the pinch bolt. If you have to re-angle the carb, your hard work will be rendered useless and you will have to clean up the components and go through the process again.

Pushing down on the carb will help to seal the two parts together as the O-ring normally sits between the carb and the crankcase so a tight fit between the two is always beneficial.
Safe Pinch
For that added bit of security, you can drop some of the sealant over the two ends of the pinch bolts that holds the carburettor in place.
This will prevent this from coming lose and also seals another potential leakage point.
Final Step – Bolt Check
With everything in place, it is worth just running your screwdriver over the screws once again to make sure they are tight. Even though you have not removed the head, you should check the four or six head bolts just to make sure – you never know.
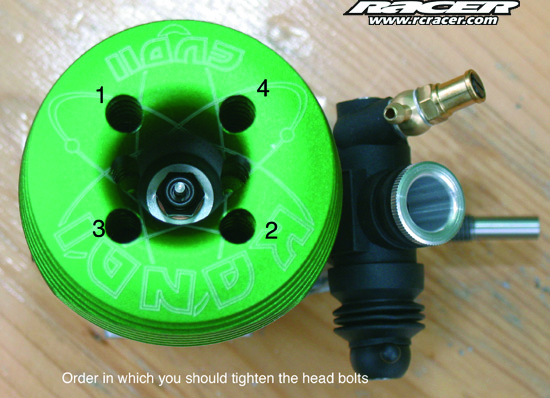
Remember that you should work in a diagonal direction as you tighten these bolts – see the diagram for more details.
With all the bolts securely in place allow the sealant to go off overnight before using the engine.
Any point where there is a mating face can be a source of an air leak on a nitro engine


