


How To Accelerate Accurately
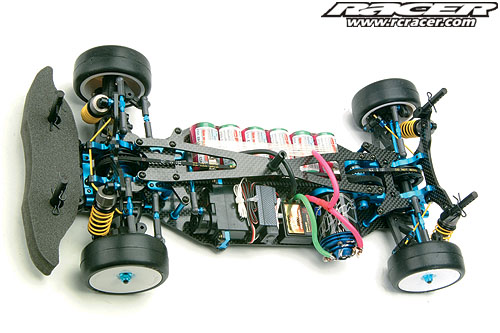
Race tracks always have plenty of corners to tame, but it is important to ensure your touring car is equally adept at handling the straight bits.
The race is about to start. The countdown has begun, the tension is building, and your left-hand is poised, ready to apply the throttle. You know that a good start is needed, one where your car will be in the thick of the action come the first corner. Suddenly the main buzzer sounds. Instinctively, you floor the throttle; the car leaps away from the line. But instead of heading forwards, it shoots sideways instead, straight into the large barrier at the side of the track. This is not looking good!
If you are one of those frustrated drivers whose touring car never seems to want to accelerate in a straight line, then now is the time to track down the culprit. Now matter how good your chassis set-up may be at negotiating corners, if your car veers in one direction on the exit of corners, or drifts sideways down the main straight under full power, it is unlikely to be competing at the front end of the action. So what are the four most common causes of a car that simply won’t accelerate in a straight line?
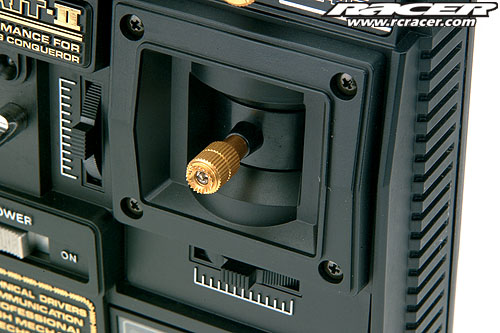
Transmitter Trim Settings
Ensuring your car tracks in a straight line might appear to be an obvious requirement, but at club level in particular, incorrect trim settings on the transmitter are often at fault for a car that appears to have its own interpretation of the best racing line. The front wheels only need to be off-centre by a fraction for the car to pull to one side under acceleration, so even if the wheels seem to be perfectly in line when the car is sitting on the pit table, always confirm this with a simple straight line check on the track.
To do this, place the car on a completely flat section of the circuit and slowly drive the car forwards using just the throttle control, watching to confirm whether the car tracks in a straight line. If it drifts over to the right, move the trim lever on the transmitter to the left to bring the car back into a straight line. Now perform the check again. After two or three runs, you should have found a trim setting that enables the car to track straight. At the top level, you will see drivers performing these checks before each race, making short practice runs to adjust their steering trim setting before the car is placed on the starting grid.
On odd occasions, the required trim setting might fall between two clicks on the transmitter lever. If you also have a digital trim setting, you may be able to compensate for this by adjusting the finer setting of the digital trim (Trim Rate).
When you are in the pits, you can finely tune the setting on the linkage off the servo horn or servo saver to the steering drag link. Quarter or even an eighth of a turn may be enough to get your car running perfectly true. Alternatively, it may prove necessary to get the screwdriver out and reposition the servo saver on the servo arm. Moving this by one notch may be all that is necessary to find a better position. You will also need to do this if the trim lever on the transmitter is left at the extremes of its movement once the ideal trim setting has been found.
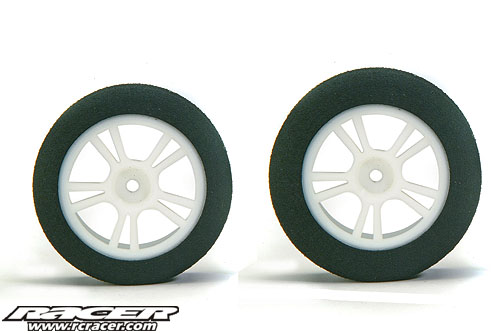
Tyre Diameter
Thankfully, this culprit has become much less common following the move to moulded rubber tyres. Before that, foam tyres were the primary choice of touring car racers, the tyres being glued to the wheel and then trued to the required size. Things would start off just fine, but foam tyres tended to wear rapidly, and very rarely would all four tyres wear at the same rate. Unless you adopted a rigorous routine of swapping the tyres round after every race, before long you could end up with larger tyres on one side of the car than the other, and then the problems began. Since the diameter of the tyre affects the gearing of the car, the car would now effectively have a different gearing on each side, causing one side of the car to attempt to spin the wheels faster than the other side and thereby putting the differentials under load. The handling could then become very unpredictable, with the car behaving differently around left-hand and right-hand bends.
Of course, the simple cure with foam tyres was to always true them again before the next race to ensure the diameters remained identical. With moulded rubber tyres, that messy task is no longer needed as the tyre diameter remains largely unchanged, regardless of wear. Now it is how well the tyre has been glued to the wheel that primarily dictates how accurately the car accelerates. Assuming that the wheels on both sides of the car are the same size and have the same tyre insert and rubber compound, the most likely reason for unpredictable handling will be if one of the rubber tyres has started to separate from the plastic wheel. This will cause the tyre to swell under acceleration, altering both the size of the tyre contact patch and the gearing on that side of the car. For this reason, it is important to always check the tyres after each race to ensure they remain firmly glued to the wheel. A small drop of super-glue should be applied whenever a gap is detected. Even the smallest of gaps can grow bigger once subjected to the enormous sideways forces the tyres have to contend with on the racetrack.
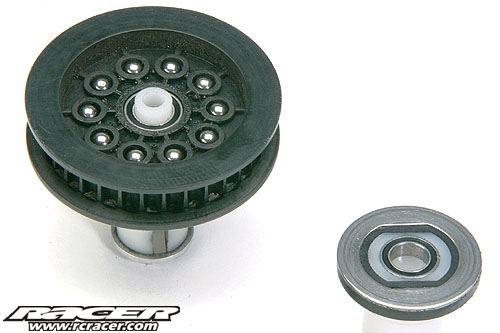
Differential
When “flat-pan”, two-wheel-drive circuit cars were all the rage in the early 1990s, the setting of the rear limited slip differential was absolutely crucial to ensuring the cars exited corners in a straight line. The differential setting remains just as important on two-wheel-drive cars today, but it can also affect the way a four-wheel-drive touring car accelerates out of a bend.
A differential is fitted to aid cornering as it allows the wheel on the outside of a corner to travel faster than the wheel on the inside. In doing so, it prevents the inside wheels from being dragged round the circuit as this would quickly wear out tyres and make the car less precise to drive. If they have been set up in accordance with the manufacturer’s instructions, differentials usually require very little maintenance. However, after a while they may develop a “gritty” feeling, caused by dust entering the sealed unit. A rebuild of the differential is then required.
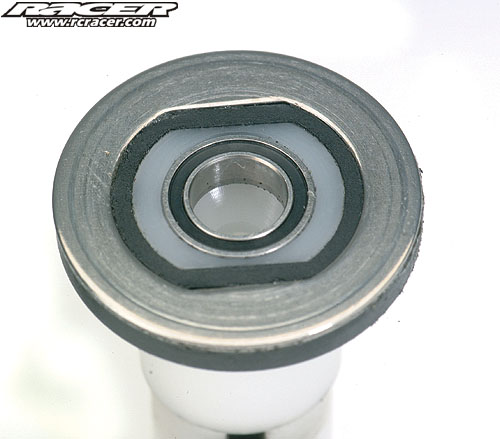
As a general rule, you are much less likely to notice the effect of a sticking differential on a high traction circuit where the differentials can be set tight. But on slippery or bumpy surfaces where the differential is often set loose to help distribute the power between the wheels, a “sticky-diff” will cause the car to pull to one side under acceleration. Remove the unit from the car and perform a rebuild whenever you detect that the movement of the differentials is not as smooth as it should be. Sometimes, it is just a matter of removing the dust from the unit; other times you may need to replace worn parts such as the circular differential plates, or the tiny balls that run on them. Most manufacturers market “differential rebuild kits” specifically for this purpose.
Chassis or Suspension Tweak
For a touring car to handle consistently, it needs to have the same amount of weight placed on the left-hand and right-hand sides. If more weight sits on the right-hand wheels than the left, then the car will simply pull to the side when the throttle is opened. This difference in the weight distribution is often referred to as “tweak†and can be caused by a number of different factors including a twisted chassis, unequal length shock absorbers, uneven droop screw settings and inconsistent settings of the shock absorber collars.
Get Tooled Up
There are many measuring tools available on the market that will help you check for tweak. The most elaborate, such as the Integy Digital Weight Distribution Gauge, allow the corner weights of the car to be accurately measured, confirming that the static weight distribution is entirely appropriate.
Chassis Tweak
To check for chassis tweak, you must first remove the wheels and the battery straps, and then place the car on a perfectly flat surface such as a chassis set-up board. If the chassis rocks from side-to-side or from back-to-front, then the chassis is twisted. The way to fix this depends on your type of chassis. If there is an upper and lower chassis deck, undoing the screws on the top deck, pushing the lower deck onto the flat surface, and then pinching the top deck screws tight again, will typically fix the problem. If you have a one-piece moulded chassis, then removing any obvious twist may require a whole new chassis to be fitted.
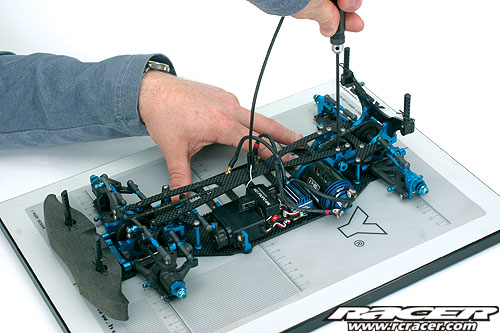
Suspension Tweak
If the chassis is flat, any remaining tweak will be caused by the suspension settings. To confirm this, first measure and mark the centre of the car’s chassis at the front and the rear. Now place the car on a completely flat surface and lift one end of the chassis on the mark you have just made by using the tip of a modelling knife blade. Raise the car until both wheels are clear of the ground and then slowly lower it back down. Both tyres should touch the ground at the same time. If they don’t, then the suspension is tweaked.
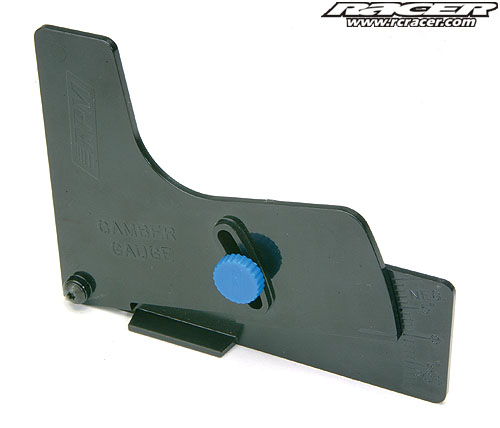
If your car allows the suspension droop to be altered, first check that the droop screws have the same setting on each corner of the car. A droop gauge can be used to do this. Different droop-screw settings will have the same affect as different length shock absorbers and will cause the car to roll more round some corners than others. The amount of left and right droop needs to be identical, but the amount of front and rear droop can be different.
The next thing to check is whether the shock absorber on the left of the car is the same length as the one on the right. Use a set of callipers to do this. Finally, check the position of the threaded collars or the number of plastic shock spacers. Ideally, the shock absorbers need to feel equally firm. Assuming both shock absorbers have the same amount of oil in them, the tension on the spring is the area to adjust. If the right-hand tyre touches down before the left-hand side, you can either increase the preload of the left-hand tyre by winding down the collar slightly, or decrease the preload on the right-hand spring by winding the collar up.
Note that even though the quality of today’s touring cars is extremely high, the differences in shock absorber size and mouldings may require the collar settings to be slightly different on each corner of the car. However, if this difference is more than about 1mm, it suggests the tweak might more likely be caused by a twisted chassis.
Ready to Go
With the tweak removed, an equal weight distribution on both sides of the car, the differentials acting as intended, the rubber tyres firmly glued onto the wheels, and the transmitter trims set correctly, your touring car should now be capable of accelerating in a straight line every time. Only now can you focus on that first corner of the race, safe in the knowledge that when the throttle is floored, the car will behave entirely as intended.


the srate line is always the one between crashes and avoiding crashes on corners thank you fore this verry informative artical it pays to be reminded of the cures for this problem an older reader