


How To Paint Injection Moulded (Hard Plastic) Bodyshells
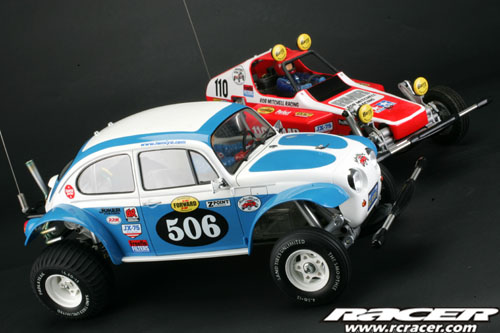
Although lexan shells are by far the most common in RC cars due to their strength and light weight, there are still plenty of kits around that use injection moulded hard plastic bodies. Some of the Tamiya scale like kits do such as the 1:14 trucks, three speed pick-ups such as the Ford F350 and Tundra high-lifts and more recently, the re-releases of the Buggy Champ (Rough Rider) and Sand Scorcher. The latter is our victim here as we show you through this step by step guide how to finish these tricky bodyshells like a pro.
Injection moulded plastic is what is used for scale model kits so it is no surprise that the skills in this field are what apply. A good result depends on several factors such as a clean painting environment, good preparation and above all taking your time and letting paints cure properly.
 |
 |
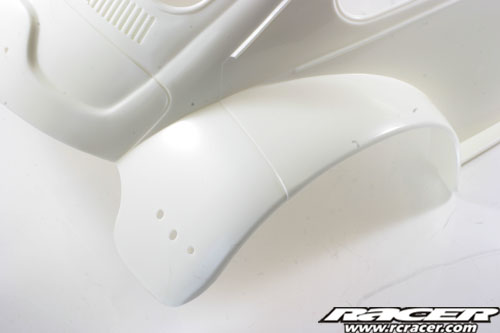
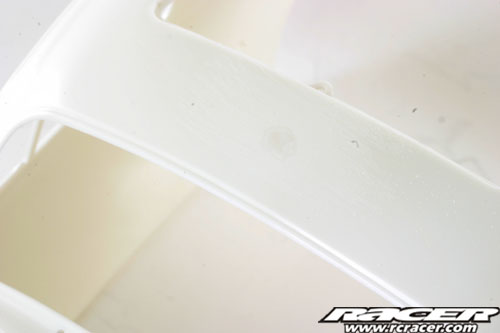
When you crack the bodyshell out of the box, all will look fine until you look closely. Here you can see on the front and rear arches the mould separation lines left by the injection moulding process. Many ignore these but here we are going to sand them back using sanding sticks and paper to give a smooth, uninterrupted curve to the arches. Also in the front area there is a dip on the vertical surface due to plastic shrinkage in the mould next to the seam. This is filled with medium viscosity superglue, left to dry then sanded back to the shape of the body.
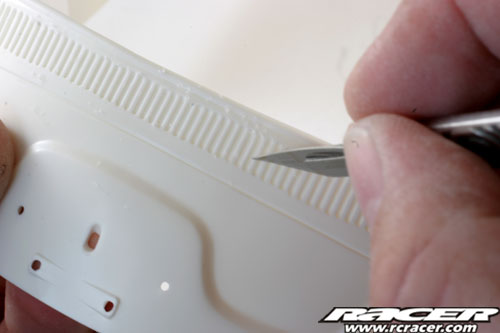
There will also be some moulding flash. Here it is being removed form the edge of the rear vents using a new scalpel blade, removing the raised, flashed edge.
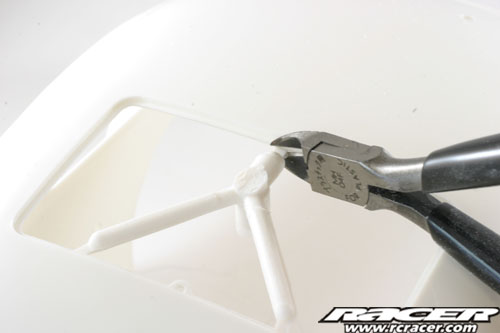
The sunroof panel comes separately on the Sand Scorcher. Here the moulding excess is being removed with a pair of sharp side cutters before the edges being dressed with a sanding stick.
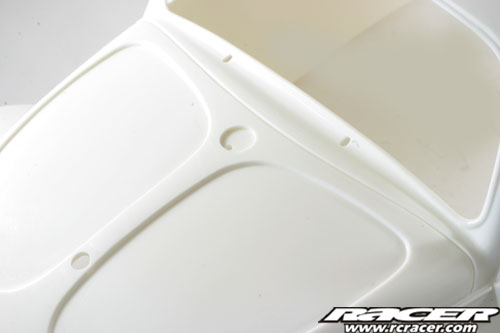
Here you can see the edges have been dressed. What you can’t really see in the image that well is that there was a sink mark where the screw moulding boss is on the underside of the roof. This causes a small dent in the roof and the same approach to filling was used here as before, medium superglue in the sink mark and then sanding to shape.
The front panel of the bug is separate from the main body. It is a tight fit between the front arches, so tight that you run the risk of scratching the paint if you install it after painting due to the paint layer build-up. Here I installed this part now before painting commenced.
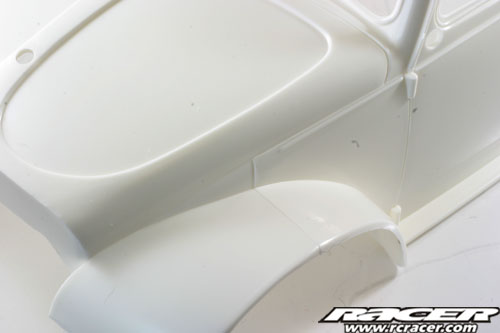
The dressing with sanding sticks extended to all edges of the body including the window apertures to give smooth edges.
 |
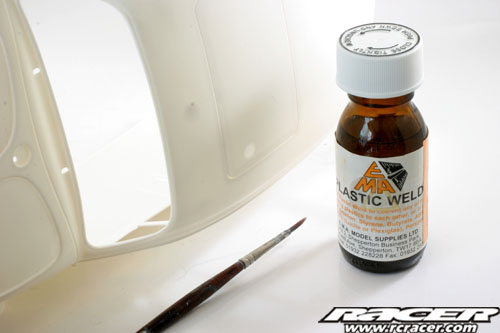 |
The sunroof was also fixed in place before painting seeing as it is the same colour of the body. A product called Plastic Weld was used here. This is applied by brush, hold the two parts together and a drop is applied to the joining edges on the underside. The Plastic Weld is very thin and capillary action takes it round the join, fusing the parts together.
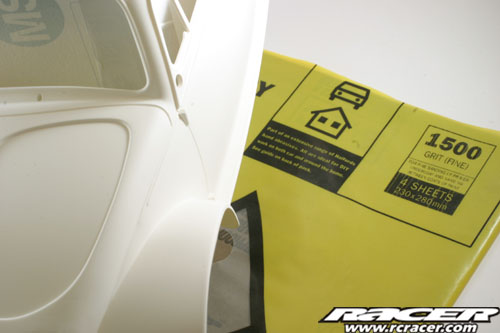
The body is then wet sanded with 1500 grit wet and dry paper and left to dry thoroughly. Then it is cleaned off and the first primer coat applied.

I am using Halfords Automotive spray paint for the Sand Scorcher although the same painting and preparation techniques are used for virtually all paints. White primer was carefully built up over three coats on the main bodyshell and add on parts. The body and parts were then left of 24 hours for the primer to fully gas out and harden up. Then the wet sanding was repeated with 1500 grit paper, taking care not to go through the primer. This was done to remove any imperfections and give a good key for the main body colours. The body was then cleaned down and left another 24 hours for the primer to fully harden.
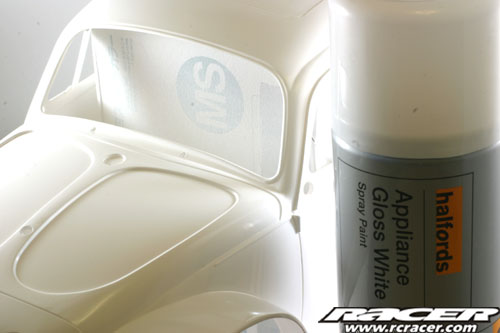
Time for the first colour coat! Here I used Appliance Gloss White, again from Halfords. The colour was built up over three coats, leaving 20 minutes or so between coats to let the paint flash off. Make sure your coats are light and even. After the three light coats, the body was left for four or so hours, then a “wet” coat was applied. A wet coat is basically one where you can see the gloss and the paint is applied heavier than before. Be careful not to get any runs though! After this was done, the bug was left for 24 hours for the paint to harden, then any imperfections or dust wet sanded out using 1500 grit paper. Then it was left another 24 hours for the white to harden.
 |
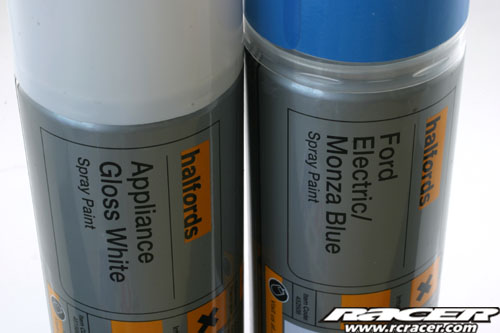 |
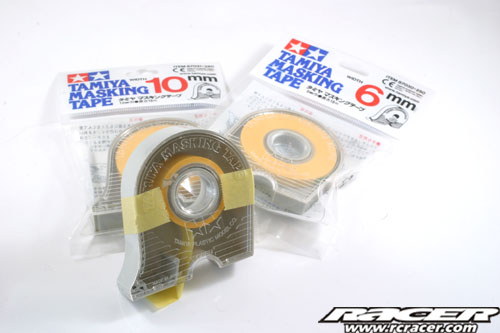
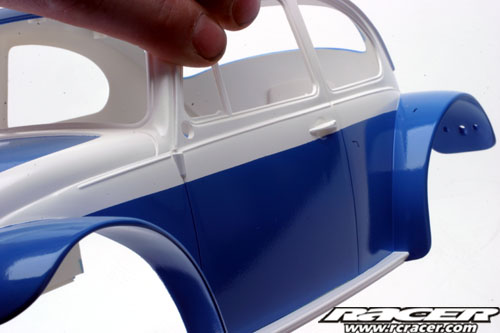
Now onto creating the famous blue and white colour scheme. For the masking, I used Tamiya Masking Tape for one reason, there is none better for the task in hand! The blue paint used was Halfords Ford Monza Electric Blue which looked a close match to the box artwork colours.
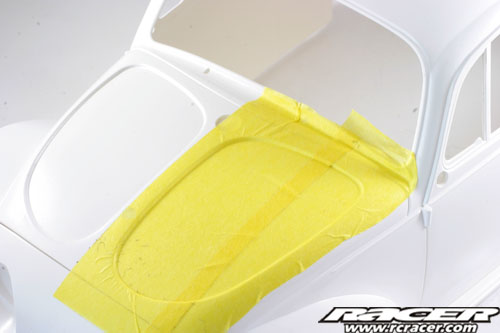
Although looking simple, the Sand Scorcher colour scheme needs accuracy to look right. The blue panels on the bonnet are masked in the recesses which is tricky as the tape doesn’t really want to adhere into the tight curves. Apply the tape pushing it into the corners as you lay the tape down, rather that trying to push it in after laying it over the recess.
 |
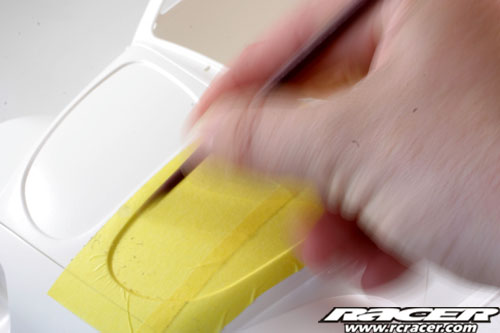 |
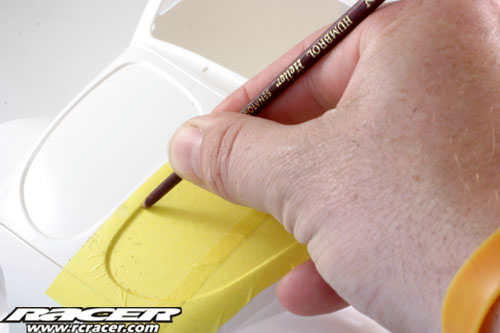
Another trick I use is to then burnish the tape into the recesses. A modelling paintbrush handle is ideal for this, gently rubbing it along the recess to push the tape down fully. This will help the masking give a cleaner, crisper paint edge while reducing the chances of paint bleed under the tape.
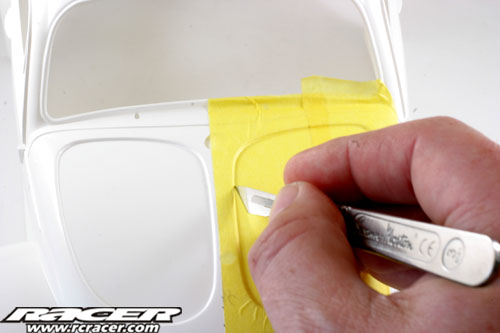
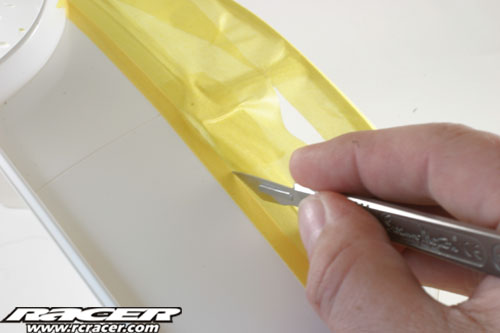
The portion to be painted can then be cut from the masking. ALWAYS use new blades to do this otherwise the tape will tear. Remember, you don’t need the pressure of 1000 elephants, you are only cutting through the masking tape! Cut the masking in one sweeping draw of the blade if possible, it will give a smoother appearance to the masking on any curves.
 |
 |
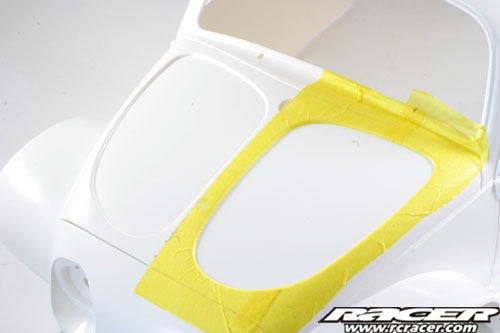
Here is the masked panel on the left and on the right, both bonnet panels masked.
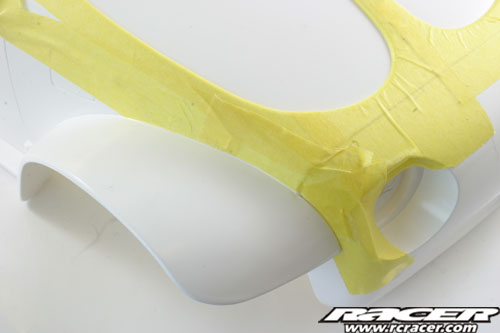
The rear end also needs masking for the blue and this was carried out in the same way as the bonnet recesses, applying the tape carefully taking into account the contours of the shell before burnishing the tape down and cutting the masking.
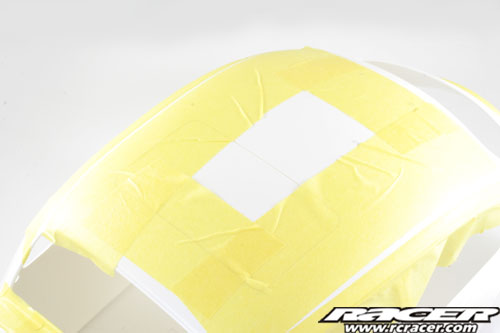
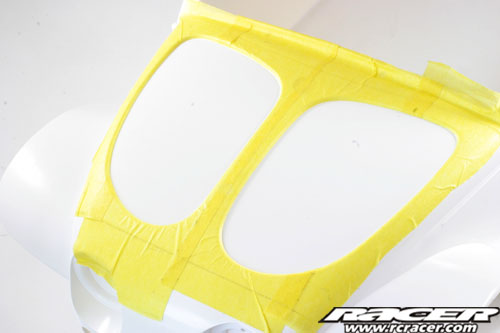
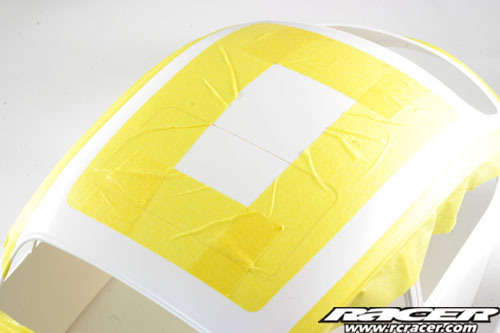
The roof requires the centre part in white with an even blue edge. First the roof area was masked with some overlap, making sure the area where the masking was going to be cut was well applied with no wrinkles in the tape.
To cut the straight edges, another idea was employed. Over the masking, use some 10mm wide tape to mark where you want to cut over the main masking. This achieves two things, you can use the width of the 10mm tape to make sure you masking lines are parallel and secondly, if you are careful you can use the tape edge as a straight edge to run the scalpel blade down, giving a straight line to your masking.
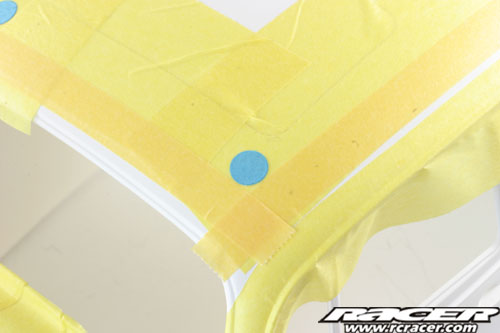
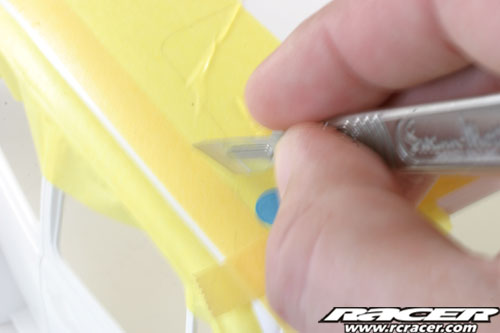
In the same way as the 10mm tape is being used, small stick on dots were used in the corners to run the blade around the edge of to give even radii on all corners of the roof.
 |
 |
The masking was then cut with the scalpel as before and here is the result!
 |
 |
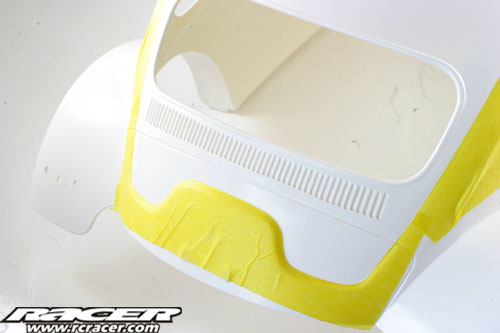
Moving to the sides, these were masked using the 10mm tape to give a straight edge with the arches masked by burnishing the tape with the paintbrush handle and cutting carefully along the moulding crease to give the edge.
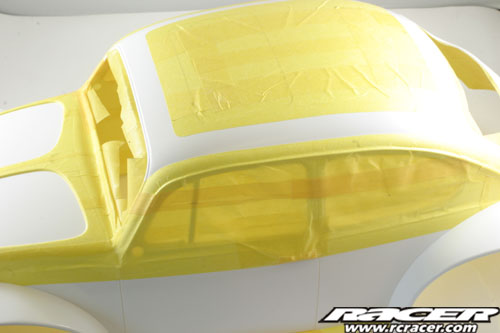
Now take care to fill in all the exposed areas that need to remain white and the masking of the outside of the shell is complete! But were not done with the masking tape yet…
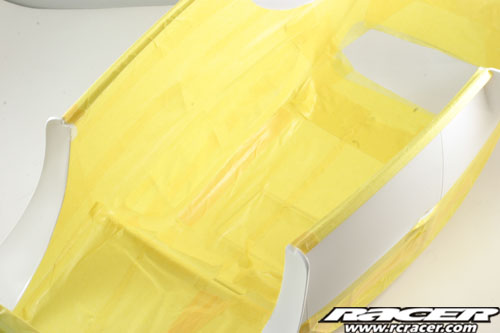
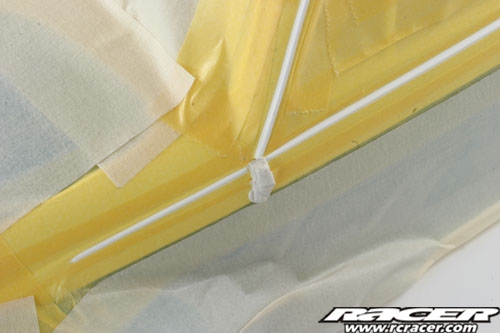
As you can see into the bug’s bodyshell, the overall job would be spoiled with loads of nasty overspray on the inside. So the inside of the shell is masked too.
 |
 |
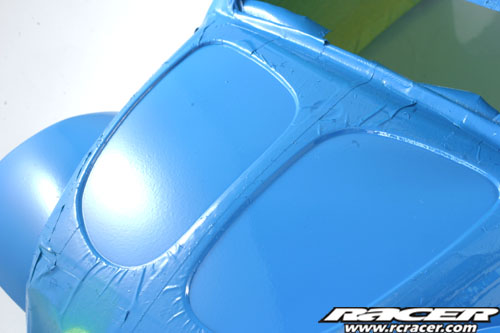 |
Laying down the blue. Here in these three images you can see the blue being built up in three coats to give an even depth of colour. Don’t worry too much about getting a deep gloss finish at this time, you are applying the base colours. Surface finish will be taken care of by the clear coat that goes over the paint.

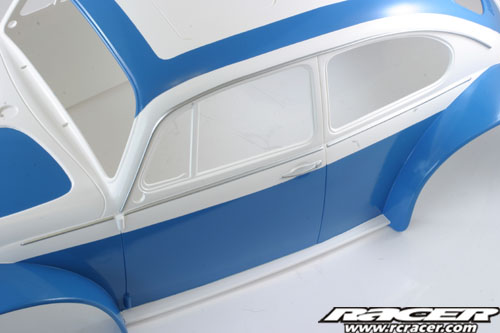
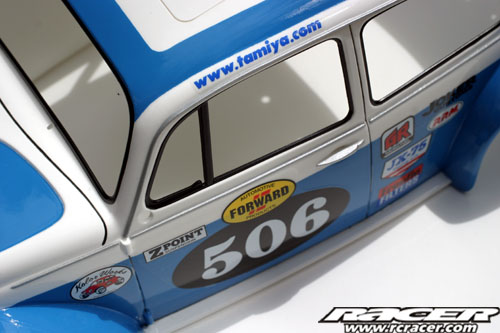
Let the paint dry properly for 24 hours, then you can remove all your masking and see the results of your handiwork! You should end up with nice crisp lines, straight and even.
 |
 |
Next the body is shot over with three coats of Halfords Clear Lacquer, two mist coats to give a key and then a wet coat. The body is then put aside for three days for the lacquer to fully gas out and harden. Halfords Clear Lacquer, actually most clear coats have long drying times….if you try and mask before it has fully hardened, you run a great danger of marking it with the tape.
 |
 |
Time to crack out the tape again and mask up the details. Although the Sand Scorcher instructions don’t call it out, the box artwork shows all the chrome trims painted. So these were duly masked up, the use of Blue Tac (which for some reason is now white…) is useful for masking up trick parts such as the hinges where tape would normally lift easily.
 |
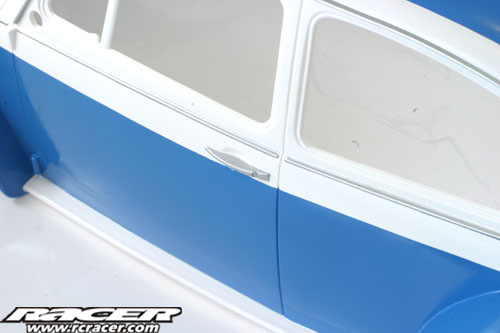 |
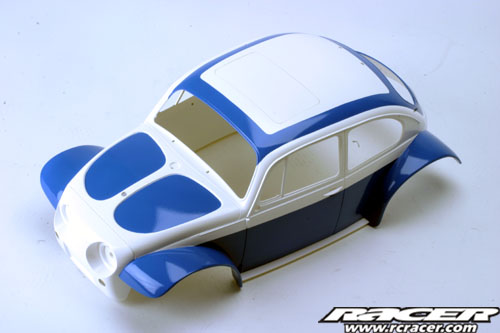
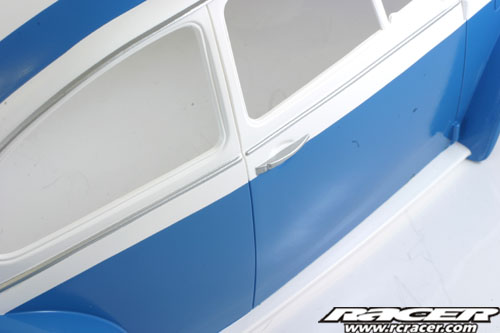
Here you can see the trims have been painted and the masking removed. The paint used was Halfords BMW Titanium Silver, decanted from the spray can by using a drinking straw against the paint nozzle and spraying it into a paint jar. This was then laid onto the body using my trusty Iwata airbrush, using low pressure and building up the paint depth and colour gradually so as to minimise the chances of any paint bleeding under the masking tape.
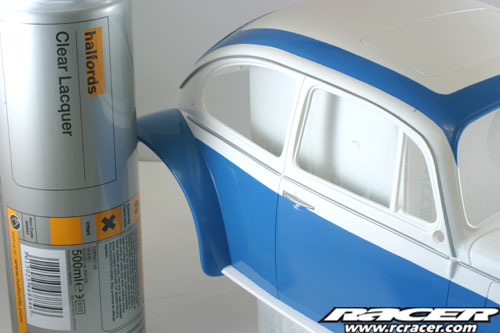
To seal all this in and build up the shine, more Clear Lacquer was applied. Five coats this time, two mist, then a wet coat, then another mist, then the final wet coat. Do this carefully and you can achieve a good finish which won’t need flatting back and polishing. If I had the time I would have done this too but copy and print deadlines were looming for the Racer magazine review of the kit so the finish on the Scorcher is ‘straight from the can’.
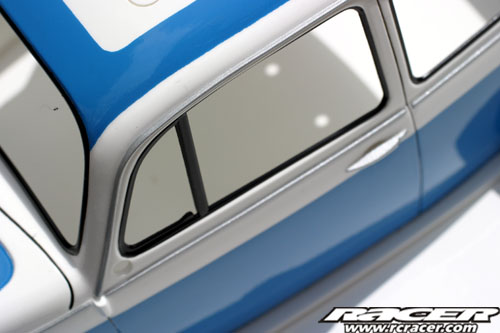
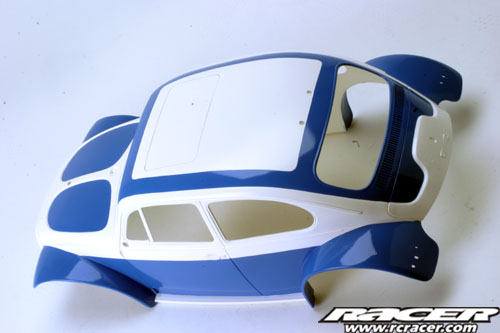
The final step on the main body is the window trim painting. The bodyshell was left for a week for the Clear Lacquer to fully harden. Having put this much effort and time in, now is not the time to rush! No point in risking marking the finish with masking before the paint is cured is there. Halfords Matt Black was used on the window trims, again decanted from the can and laid down by airbrush after masking using the same procedures as before.
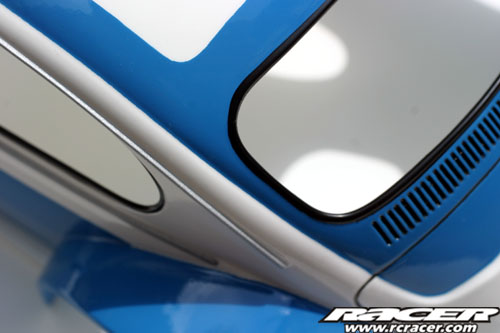
To add some finishing touches, the panel lines and vent detail was picked out using a very fine paint brush and Humbrol Enamel paint. Be careful, take your time and remove any slight indiscretions with tissue paper and a small amount of white spirit. Be careful though, you can damage the surface finish with white spirit if you are too aggressive!
 |
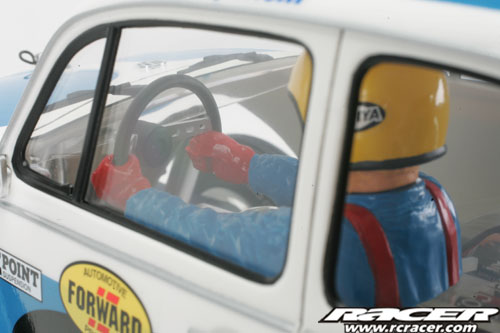 |
There are small detail parts to be added to the Sand Scorcher body too, don’t forget these! Painted in the same way as the main shell, here you can see the lights and driver figure. Taking time with every element ensures a good job.
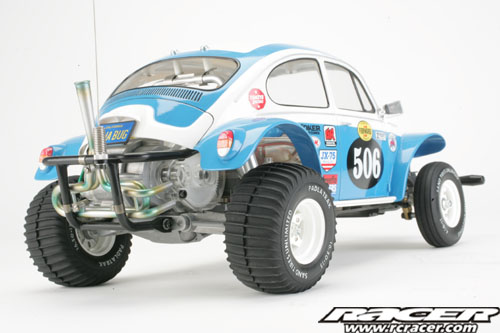
The end of the road now, sticker it up, bolt on all the bits and you are away! The only problem is with the amount of time and effort put into your masterpiece, you now won’t want to run it!
Scroll down to the gallery below and click on the images to see larger versions of some of the smaller pictures in this article.


Nice job. I just want to know if I should use Tamiya Plastic or Polycarbonate paint on a hard plastic body like the Sand Scorcher? I assume it doesn’t really matter. It seems like there are more color choices for polycarbonate paints. I understand that polycarbonate paint was made for polycarbonate bodies but does that mean it should NOT be used on hard plastic bodies?